We may earn a commission when you purchase through affiliate links. Learn more.
Introduction
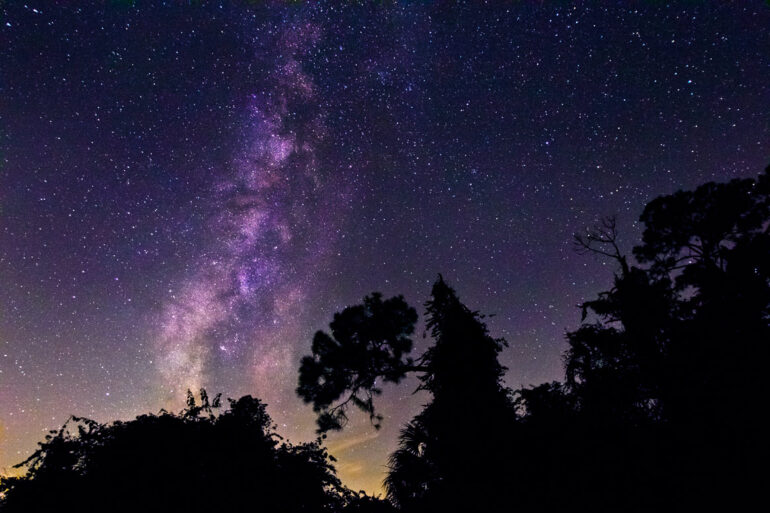
In this tutorial, we’ll cover everything you need to know to get started with star photography with a digital camera. If you’re headed outdoors to a remote location, getting beautiful photos of the Milky Way shining brightly in the sky overhead is one of the ultimate treats for any photographer, and with an understanding of the basic concepts of exposure, you’ll get some amazing shots with a little bit of practice.
A lot of people who read this have unfortunately never seen the Milky Way in the night sky before. If you’ve never seen it, chances are good that you live in or near a big city, where the bright lights drown out the dim starlight overhead. Photos of the Milky Way might look like they’ve been created using rendering software, but being able to gaze up at an inky black night sky and see a misty cloud of white stars is an experience and view that’s very real and very worth seeing in person. Sadly, it’s a sight that’s disappearing in more and more places as cities expand and expand. I often see people arguing online about whether or not photos of the Milky Way are real or fake — sometimes they aren’t real, but quite often it’s just that these people have never actually seen the Milky Way and have no idea that something that beautiful can actually be seen from here.
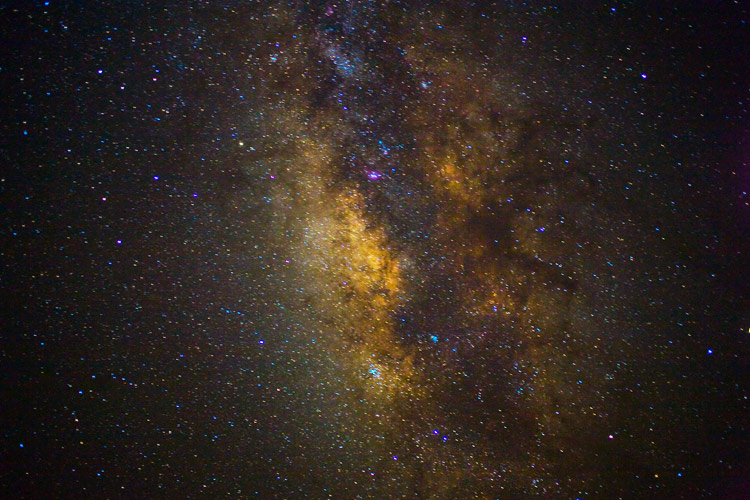
Our own solar system is contained in the Milky Way galaxy, and from our humble vantage point here on Earth, the galaxy appears as a faint glowing band that arches across the night sky. The 100 to 400 billion distant stars are so densely clustered that their light merges together into what we see as a milky cloud in the night sky. To see this amazing sight for yourself, you’ll need to head as far away from civilization as you can get on a dark and preferably moonless night. Point your camera toward the sky and you just might be amazed….
Basic Checklist of What You Will Need for Star Photography
- A dark night, a dark location, and a sky that’s clear and cloudless if possible. Moonless nights are obviously the very best for capturing the Milky Way and surrounding stars in all of their glory. A bright moon can certainly be beautiful to take pictures of, but it drowns out the light of the stars and makes star photography difficult. With a deep black sky surrounding them and adding contrast, the dim light from the stars will be more noticeable in photos. To take outstanding star photographs, you’ll need to either live in or travel to a very dark location away from the bright lights of cities and cars. Check out this light pollution map on Dark Site Finder to get some ideas of dark places near you. While long exposure photography allows the camera to capture faint light that isn’t visible to our eyes, if you can’t see the Milky Way in the sky, the light pollution from nearby cities will also be magnified in intensity in a long exposure photo, drowning out any starlight. The further away from civilization you can get, the more likely you’ll be to see the Milky Way (and be able to photograph it well). Some of the best places I’ve ever seen the Milky Way include the American Southwest, in remote parts of Texas, New Mexico, and Arizona and on remote islands in the Caribbean, far away from any major cities. Even near reasonably large cities though, sometimes a short drive of just 15 minutes into the country can reveal the Milky Way above.
- A camera that shoots RAW and can be used in manual mode. As long as your camera can be used on manual mode and can take long exposures, you should be able to take star photos. While DSLR and MILCs (Mirrorless Interchangeable Lens Cameras) have some of the largest sensors around, which offer the best low-light performance, if you’ve got an advanced compact camera that offers manual exposure control and can shoot in RAW, it’s worth experimenting to see what kind of results you can get. While it’s possible to shoot long exposure photos of the Milky Way as Jpeg images, it will be much harder to achieve high quality results during post-processing.
- A sturdy tripod that will keep your camera steady during long exposures. Anyone who has tried their hand at long exposure photography knows that even the slightest movement of the camera while you’re taking the photo can ruin a shot. A solid tripod like the ones listed in this tripod guide is an obvious necessity, and it helps to have one that is tall enough that you can extend it so the viewfinder and lcd screen are at eye level for composing and reviewing shots. Of course, if your tripod doesn’t extend very far you can simply sit on the ground, and if your camera features a swiveling LCD screen like the Canon T5i, you can just move the LCD screen into any convenient position to help you compose your shot.
- A flashlight. Not only will it help you avoid falling into holes and onto spiders in the dark, but it will also help you set the focus on your camera manually in the dark. For setting focus, I often use a small red LCD light on my keychain that is bright enough to illuminate my lens, but doesn’t hurt my night vision. Obviously, you shouldn’t keep the flashlight on while taking photos, since even a little ambient light can ruin your shot.
- A chair or blanket. There’s no point in being uncomfortable while your camera clicks away, so bring something comfy to sit on. A thermos of warm tea or coffee might not hurt too! While you’re at it….how about some snacks?
Choosing a Lens
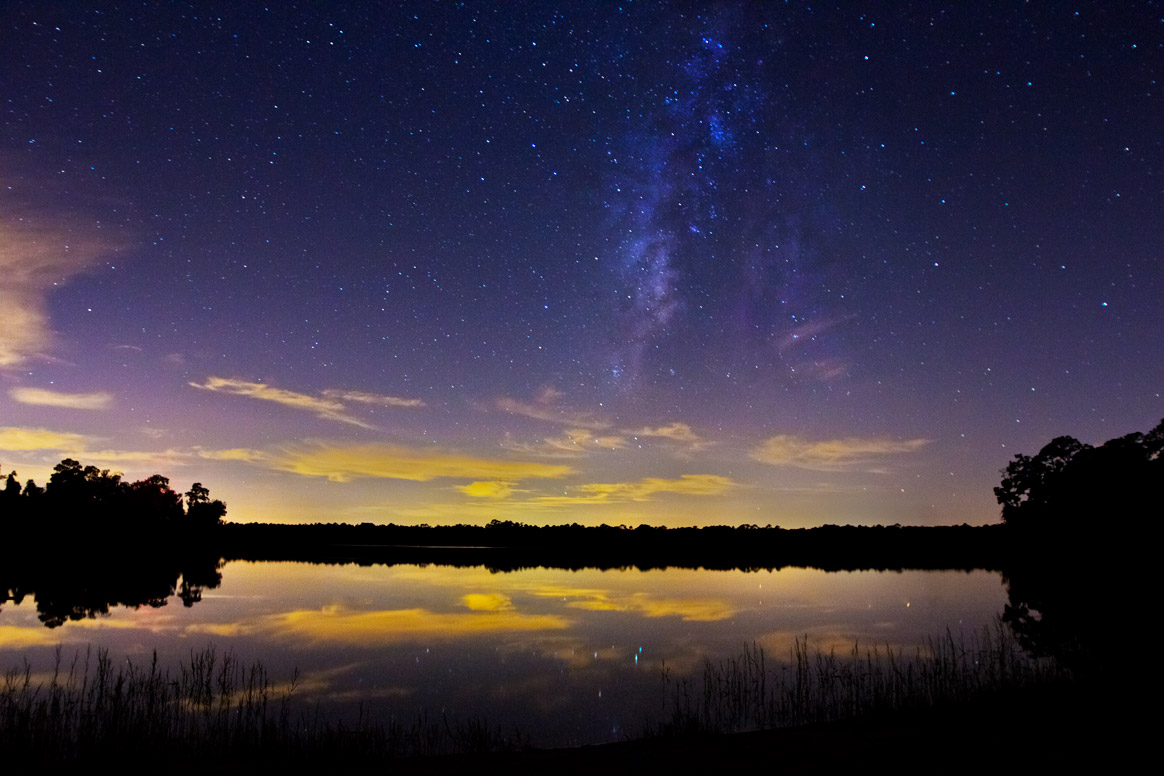
If you’re using an advanced compact camera with a fixed lens like the Sony RX1 RII or Ricoh GR II, your lens choice is obviously limited to what’s built-into your camera. With a DSLR or MILC (Mirrorless Interchangeable Lens Camera) like the Sony NEX-7 or Fuji X-E1 though, you’re able to choose the ideal lens for your star photography, at least to the extent that your budget will allow. Wide angle lenses are usually the best choice, allowing you to capture a scene that includes both the star-filled sky, as well as an interesting foreground element like trees, lakes, rivers, mountains, etc… An interesting foreground can help to make for a great composition and an amazing photo — stars are beautiful on their own, but stars above a nice scene are incredible! Not only is a wide angle lens useful for capturing the widest angle of view, the longer your focal length, the shorter you’ll be able to leave the shutter open without getting visible star trails.
Whichever lens you choose, it’s important that it’s fast, meaning that it has a large maximum aperture (a low f/stop number). The bigger the maximum aperture, the more light gets through your lens and reaches the sensor. More light means a brighter Milky Way, shorter exposure times, and a lower ISO — all good things! Ideally, your lens will have a maximum aperture of around f/2.8, but if it’s a very dark night in a dark location, you can still take nice shots with lenses that aren’t quite as fast. Because autofocus is useless for star photography, you can also use manual focus lenses which are often significantly lower in price.
Here are a few great fast wide angle lenses for shooting the night sky:
Proper Exposure
If you’re new to photography in general, you’ll want to swing by our Exposure Tutorial which will explain how the three factors of ISO, shutter speed, and aperture work together to control your exposure.
Aperture
The Milky Way may look bright to our eyes, but in order to photograph it using your digital camera, you’ll need to shoot using a very wide aperture, letting a large amount of light reach your sensor.
Comatic Aberration and Aperture
For most photographers using anything but the latest pro-level DSLR or mirrorless cameras and the very fastest wide-angle lenses, the easiest way to approach aperture when shooting stars at night is to use the widest one possible to let in the most light. For newcomers to photography, this means using the lowest F-Stop number that your lens allows.
Warning: Undefined variable $output in /home/itsjustlight/htdocs/www.itsjustlight.com/wp-content/plugins/wordpress-plugin-for-simple-google-adsense-insertion/WP-Simple-Adsense-Insertion.php on line 73
It’s worth noting though, that when you use a lens wide open, lens aberrations can become more apparent when you view a photo at full resolution, particularly comatic aberration. Comatic aberration, commonly known as coma, results in stars looking like they have a comet-like tail. This aberration is most obvious towards the outer edges of a photo, and can usually be reduced significantly by stopping a lens down one or more stops. If you happen to be using a very fast lens, for instance a Canon EF 35mm f/2, stopping the lens down to f/2.8 isn’t going to prevent you from capturing great star photos. If you’re using a slower lens like the Sigma 10-20mm f/4-5.6 lens though, stopping the lens down from f/4 to f/5.6 isn’t a useful option for star photography since f/5.6 probably won’t let enough light in without forcing you to use an ISO that’s far too high.
ISO
Picking the right ISO is a tricky proposition. ISO regulates your sensors sensitivity to light; the higher the ISO number, the more sensitive it is, picking up more light. Before you set your camera to the maximum ISO however, we need to keep in mind that high ISO settings also mean more noise. If you’re only going to use your photos on Instagram and Facebook, high noise levels might not be a big issue because the noise is most visible when images are viewed at large sizes. If you plan on printing your photos or entering them into competitions though, you’ll want to keep your images as noise-free as possible. For new cameras — both full frame and with crop frame sensors, ISO speeds of over 3200 may produce good results. For older cameras, particularly those with crop sensors, you probably wont want to go over ISO 3200 if you intend to use the image at high resolution.
Digital sensors are not all made equally — some handle higher ISOs better than others. As a general rule, full frame sensors like you find on a Canon 5D III will produce less noise at higher ISO settings than the smaller crop-frame digital sensors on a camera like the Canon T5i. With this said, I’ve been pretty impressed with some of the latest crop sensor cameras like the Pentax K3 DSLR, which have very good low light performance at higher ISO speeds. You’ll need to do some experimenting with your camera to find out how it performs at different ISO settings. Each camera will have its own upper-limit — an ISO beyond which the photos really aren’t usable because of noise.
Shutter Speed
At this point, it might seem like an easy solution to keeping your ISO speed low would be to just use a longer exposure time, letting in more light and reducing the need for the higher ISO. This brings us to the next topic:
Exposure Time for Star Photography
 While it’s not obvious to all of us on Earth, our planet is spinning very quickly on its axis. When we use a long shutter speed at night, this motion becomes visible in the form of star trails. Star trail photos can be exceptionally beautiful, but typically require the shutter to be left open for at least 15 minutes (or for shorter exposures to be stacked using image editing software). When photographing the Milky Way though, we want to avoid capturing this motion because it will cause the cloud of stars to become blurry.
The latest full frame mirrorless and DSLR cameras like the Nikon D810, the Canon 5Ds, and the Sony A7r II allow an incredible amount of detail to be captured at very high resolution. When using new full frame cameras like these, you’ll need to be very conservative in your exposure time; to eliminate star trailing while using one of these cameras and a 16mm lens, you’d need to keep your exposure time to around 25 seconds or so.
Setting Up for Star Photography
- Make sure your tripod is properly set up on firm ground with the legs locked in place.
- Make sure image stabilization is disabled on your camera or lens.
- Switch to manual mode so that you can set all of the exposure variables yourself.
- Set your lens to manual focus and use your flashlight to set the focus on the infinity setting. After taking a shot, you’ll want to review it on the LCD and zoom in to see if the focus is how you want it; if not, you’ll need to make some tiny adjustments until you get it right. In my experience, the infinity setting is rarely the sweet spot for sharpness when it comes to star photography — you’ll almost always need to make some minor adjustments to get the focus just right. Once you have your focus locked, double check to make sure you’ve turned autofocus off, otherwise once you press the shutter button your lens will begin to search in vain for something to focus on and you’ll have to set the focus again.
- Set the aperture to the widest possible setting. (That’s the lowest F-stop number) If your lens has especially problematic comatic aberration and it’s a very fast lens, you can experiment with stopping the lens down by one stop to see if the benefits outweigh the reduced light reaching the sensor.
- Make use of your camera’s 2 second self-timer or use a remote or intervalometer to make sure that you aren’t touching the camera to trigger the shutter. Even a tiny bit of movement can cause your shots to be blurry. If it’s extremely windy you may need to weight your tripod to keep it motionless. A small amount of movement might not be obvious in your shot when you review it on the LCD screen, but at full resolution it will become painfully clear when you’ve accidentally bumped your tripod or when a gust of wind shook the camera just a small bit.
- Make sure your camera’s LCD screen is turned off while you’re taking your long exposures — even tiny amounts of light can really have a big effect on your photo. (This means that you should keep your cell phones in your pocket too!) Keeping the LCD screen on also drains the battery life of your camera much quicker — most cameras will turn the screen off during an exposure, but if yours doesn’t you should do it manually.
Composition
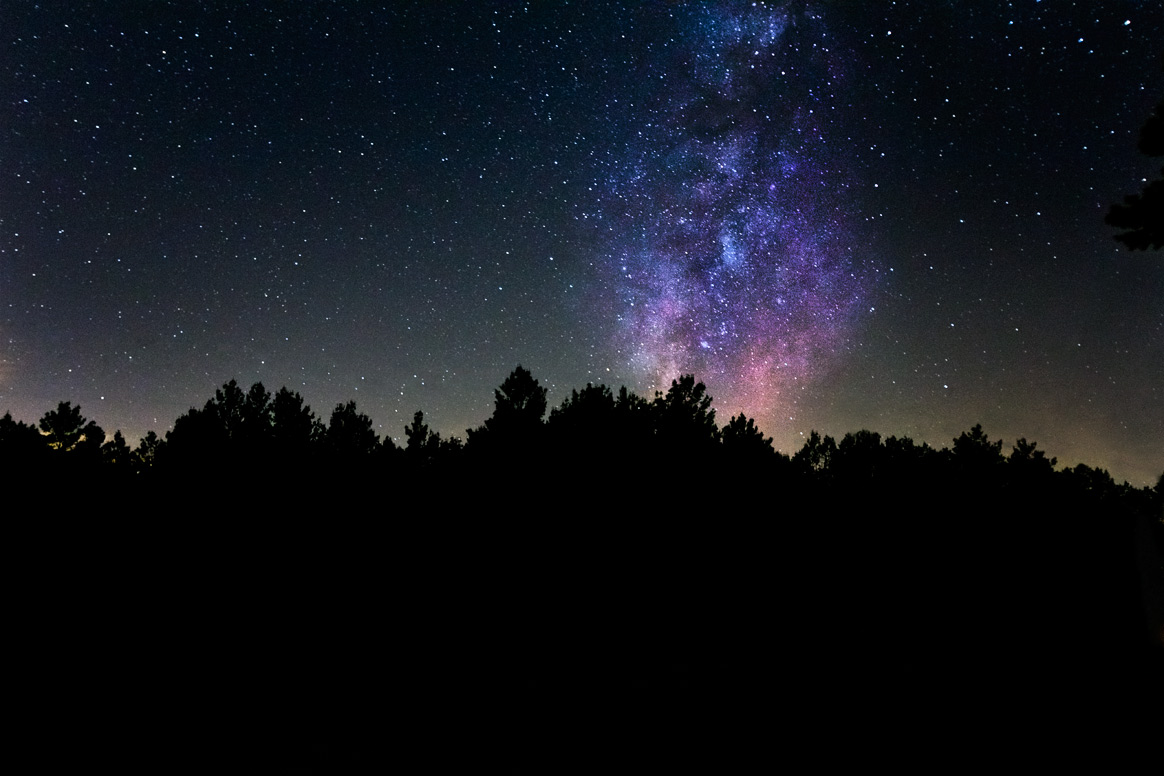
The sky is beautiful on its own, but a wide angle lens allows us to capture both the land and the sky, which makes for a more compelling image. Put some thought into your composition and search the area for any elements that might make your shots even more interesting. Maybe there’s an old, rusting car or a windmill nearby, or perhaps a mountain, lake, or tree might really add to the shot — experiment with different locations and angles and you might just capture a few winning images!
Shooting in RAW
JPEG has its uses, but shooting in RAW really is the only option for star photography. If you want to get the full scoop about why shooting in RAW is usually the way to go, we’ve got a lesson in our free photography course devoted entirely to the RAW vs JPEG discussion. The short version of why you should shoot RAW when taking photos of the stars is that RAW formats preserve all of the light information that your sensor records, while the JPEG format discards a lot of this info (that’s why JPEG files are so much smaller). When we’re taking pictures of something that is sitting in the sky about 158.7 TRILLION miles away, we want to preserve as much of the very faint light detail as possible, so using a format that just throws a lot of the information away is counterproductive. The RAW format affords us a lot of latitude during processing to correct the color temperature of the image, filter out unwanted noise, and sharpen, brighten, and make many slight adjustments to the image without degrading the image quality.
Post Processing
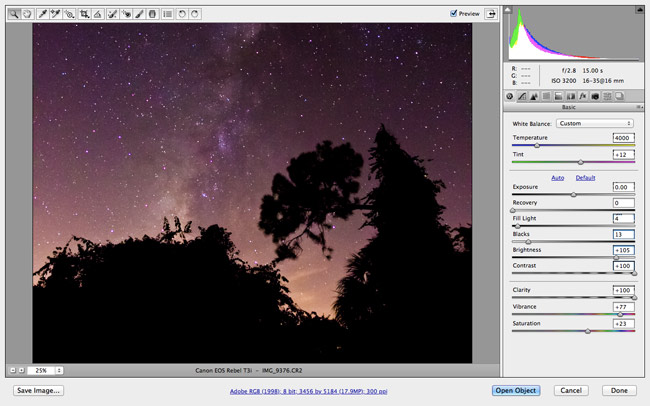
Photos of any kind usually need some post processing to get them looking their best. There are many methods for post processing images and many different forms of software to do it with like Adobe Photoshop, and several others. Whatever you use to process your images, you’ll want to start with a RAW file and then:
- Adjust white balance to desired color temperature – your camera’s auto white balance usually doesn’t get it quite right. You’ll need to decide how to balance what will look best in your final image with what you actually saw in the sky. You want your image to have the most impact, but not to the point where it seems unbelievable. Choosing the right white balance for a scene can be the toughest part of post-processing the photos. Experiment with a few versions and see what you like the best!
- Increase brightness to make the entire scene more visible.
- Increase contrast to make the stars stand out against the sky.
- Reduce the noise in your image, especially the color noise, while still preserving image detail.
- Increase image clarity and sharpness.
- Increase vibrance.
Want to learn more about long exposure photography in general? Be sure to visit my long exposure photography tutorial!