We may earn a commission when you purchase through affiliate links. Learn more.
Nowhere else on Planet Earth will you find the incredible diversity of lush flora and fauna as in the rainforest. With an estimated 40-75% of all the life on Earth found in these unique biomes, it’s no wonder that the rainforest presents an alluring subject for adventurous photographers. As beautiful as it is, the rainforest and jungle can actually be one of the most difficult places for photography. Uncooperative weather, excessive and oppressive humidity, and difficult lighting conditions make for a challenging environment to shoot in. Armed with a bit of knowledge in advance, you can make the most of your trip into the rainforest.

Planning
We all know that it’s important to plan a trip carefully, but if ever there was a time to plan it extra-carefully, a photographic adventure into the rainforest would fit the bill perfectly. While rain is obviously a natural part of the rainforest, certain times of year will have heavier and more frequent rainfall than others. For instance, in the Central American countries like Belize, Honduras, Costa Rica, and Nicaragua the rainy season generally lasts from around late April to November, with the strongest rainfall occurring in the months around October. In larger countries like Brazil with various climates and ecosystems, different regions can have very different weather, so checking the historical forecast for specific locations becomes necessary.
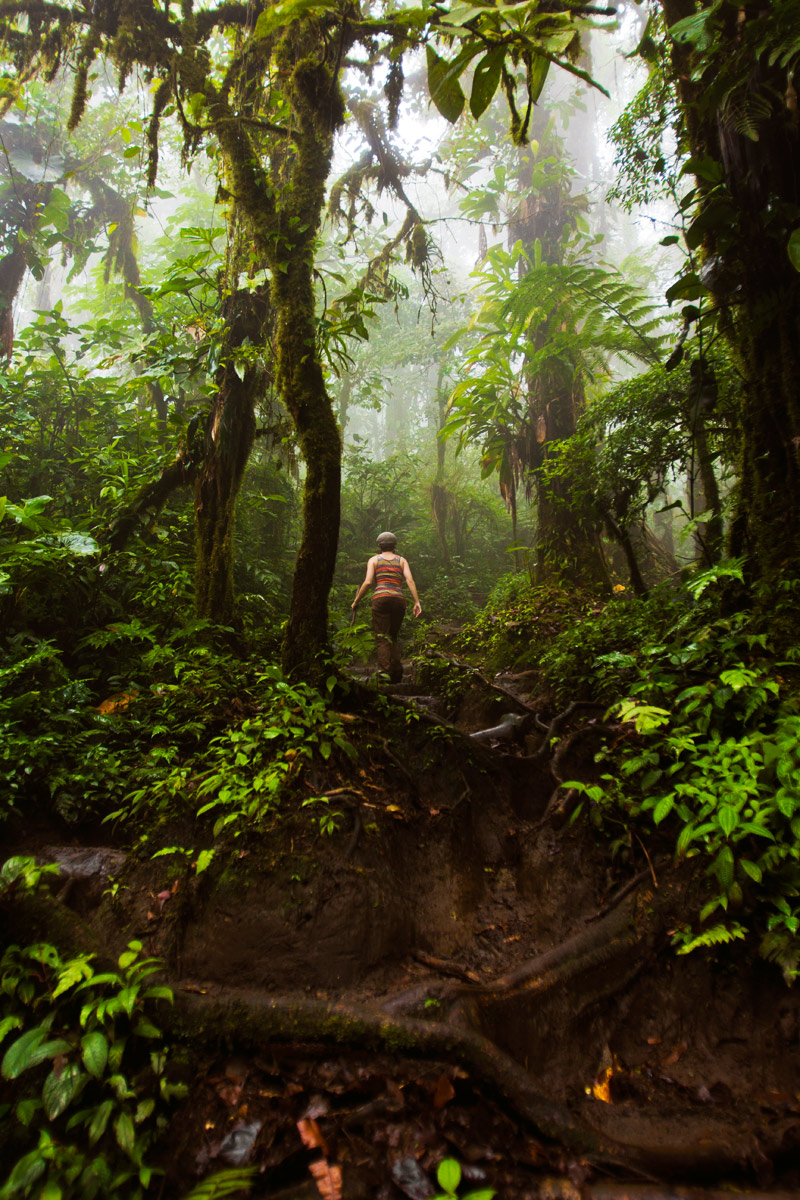
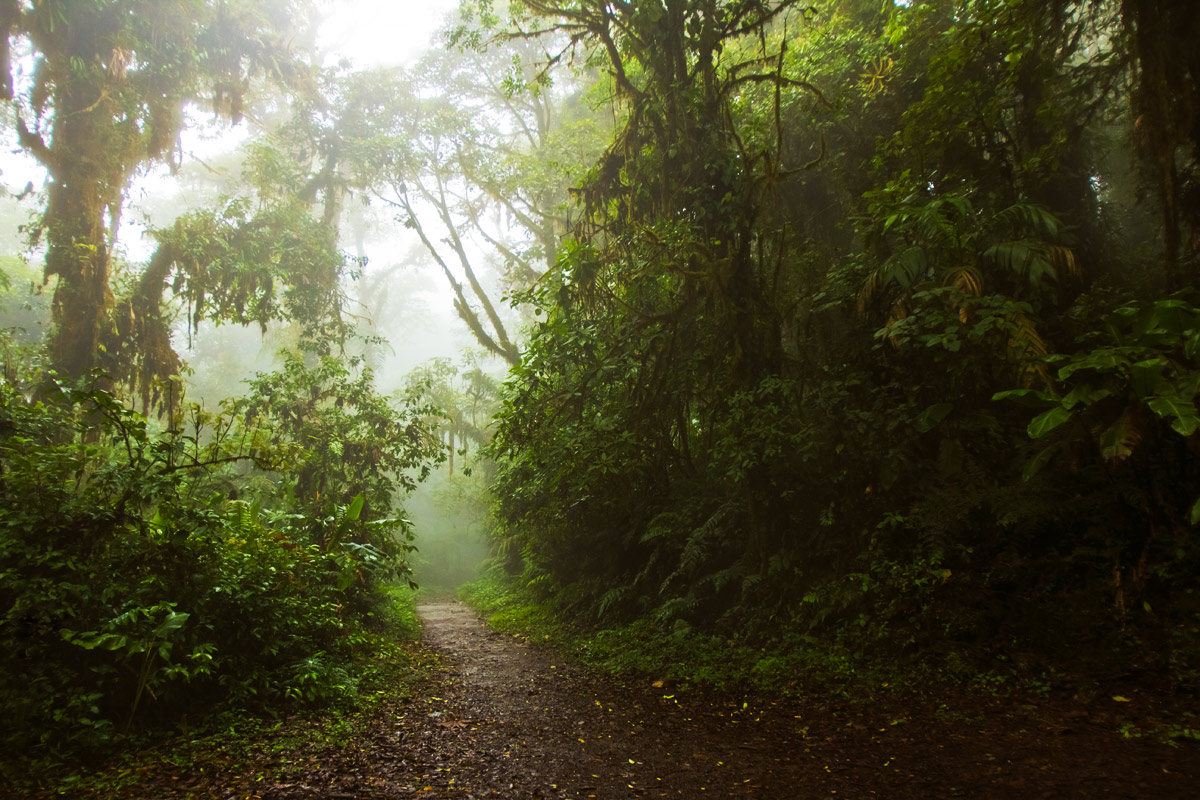
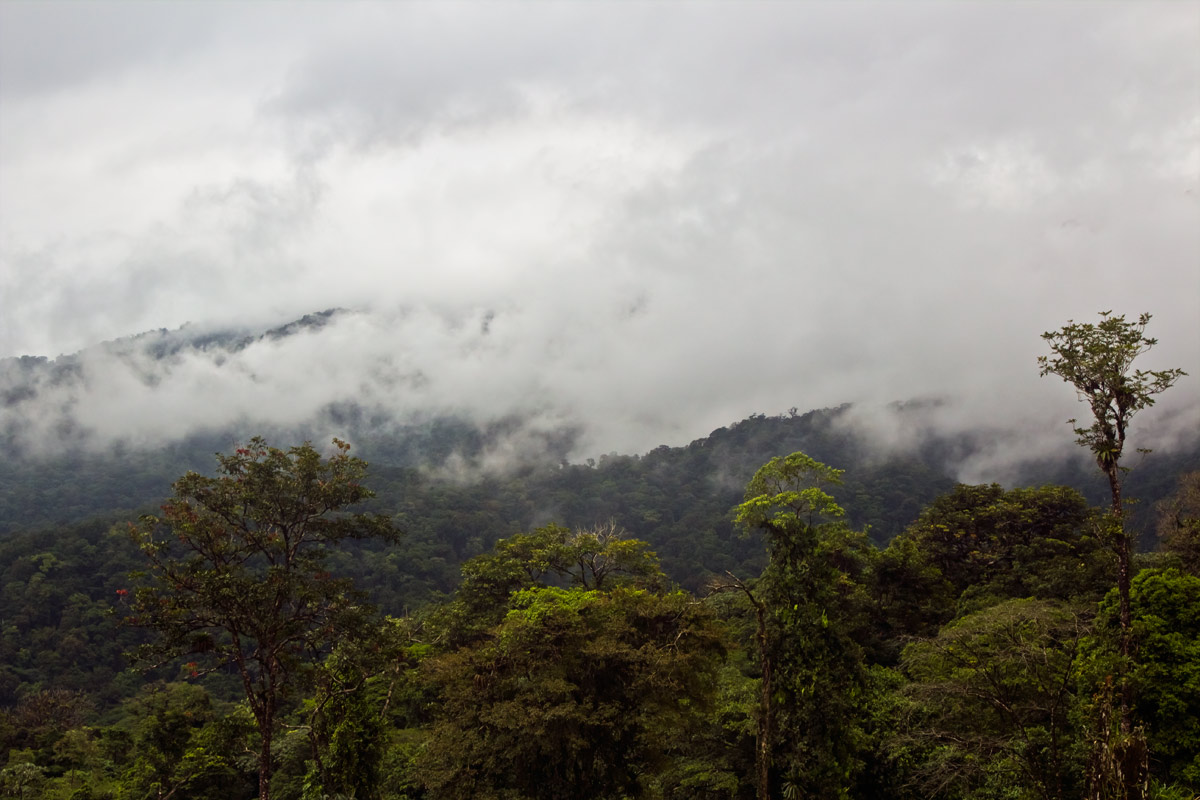
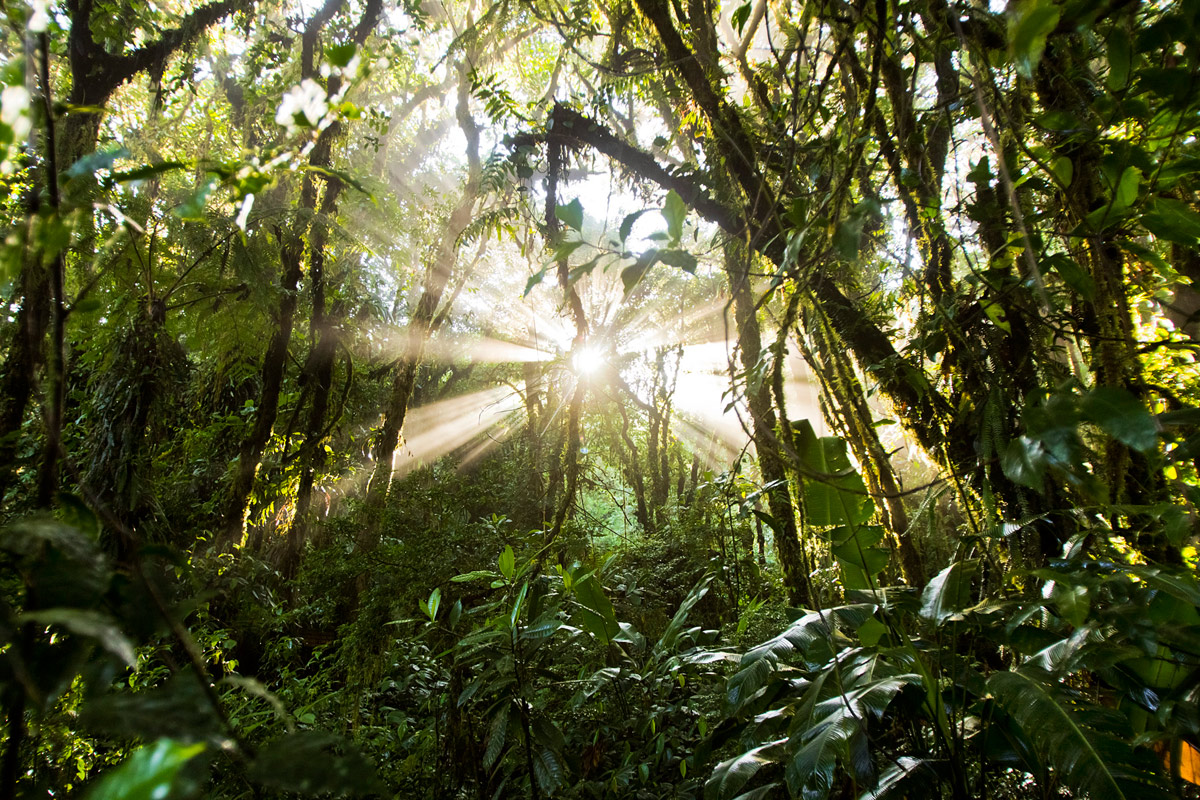
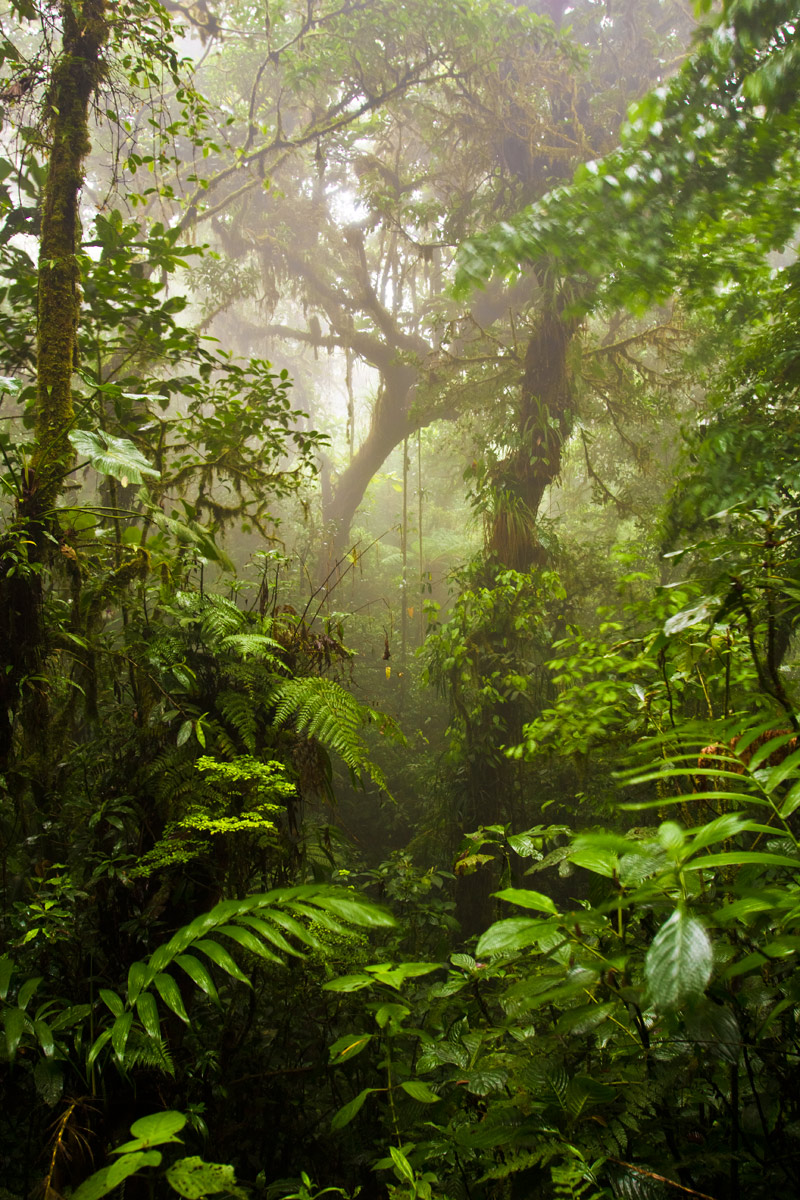
While bright blue skies and sunny weather are perfect for those tropical beach photos, when it comes to photos of the rainforest it’s tough to beat the mysterious beauty of clouds and mist swirling through the trees. A good rainforest photo is all about atmosphere, so you want to do your best to plan your trip at a time when nature will serve up the best conditions. While bright blue skies might not be what you want (in the dense forest, it’s actually much better to have an overcast sky which gives more even lighting) you probably also don’t want mudslides and torrential rains every day of your trip. While nature seldom cooperates exactly as we’d like it to, visiting the rainforest at the very beginning of the rainy season can give you the best of both worlds. I recently returned from a trip to Costa Rica at the end of April and beginning of May, and while there were some completely sunny days and some completely rainy days, most days included a mixture of weather conditions making it easy to get the photos I wanted without spending the entire day soaked and miserable.
Where to Go
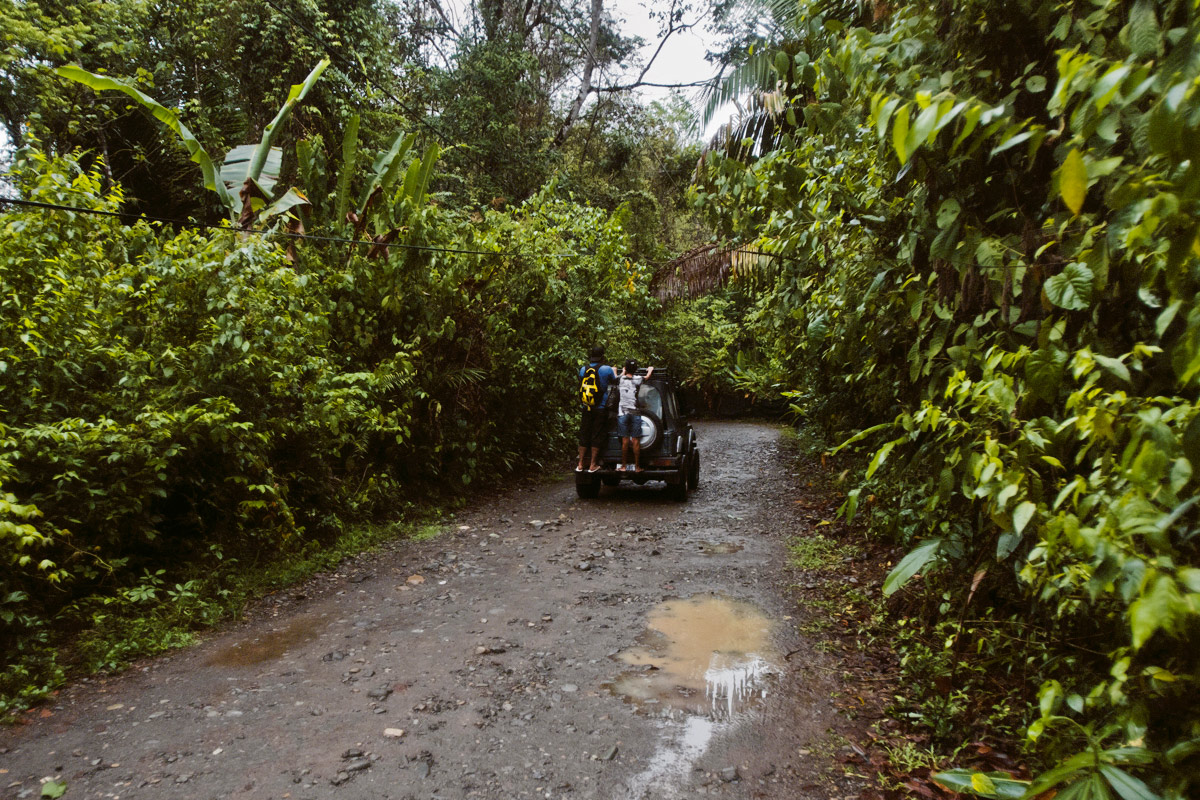
 Rainforests can be found in dozens of countries all over the world including the United States, Australia, Mexico, Guatemala, Costa Rica, Nicaragua, Papua New Guinea, Brazil, Indonesia, Bolivia, the Democratic Republic of the Congo, India, and many more. While the list of countries which are home to lush rainforests is a long one, the list shrinks dramatically if you only consider those which are reasonably safe for visitors and are politically stable.
While even developed countries have their share of crime, there are some countries with exquisite rainforests that are not considered safe for tourism. Because the political climate can change overnight, it’s important to carefully research before you choose your destination. Your time will be better spent worrying about getting amazing photos than worrying about your personal safety. This travel safety tutorial will go into more depth on how to keep your photography equipment safe while traveling.
In the rainforest itself, do your best to remain on the existing trails when they exist — not only will this help to protect the fragile ecosystem, but the rainforests of the world are filled with stinging plants and biting animals that are masters of camouflage…and what looks like a tree branch may actually be a venomous snake.
Many locations offer the services of a local guide — some guides can be worth every penny of their fee, while others may fall short of your expectations. Before booking a tour or guide, be sure to do some research on websites like TripAdvisor to see what other people’s experiences were like. Find out how long the tour will be and whether you’ll have ample time and opportunities to actually take more than snapshots along the way.
What to Bring
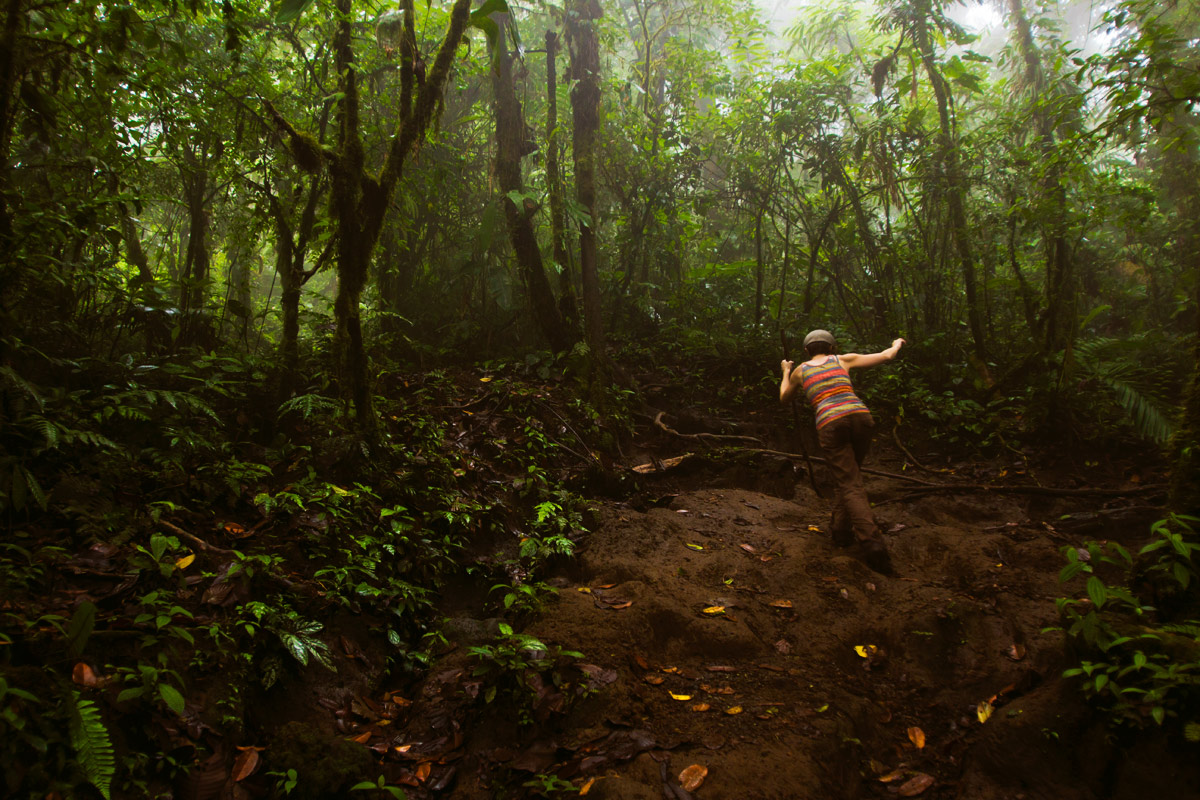
While there are some photographers who shudder at the thought of going anywhere without a bulging gear bag, the rainforest is a place where less really is more. When it’s raining and the ground has the consistency of hot, melted chocolate and the humidity lingering in the air has your hands as wet as the rain itself, you will thank yourself for not bringing 8 lenses along, weighting down your pack like a ton of bricks. While the weekend warrior variety of nature photographers may find scenic overlooks next to the highway to be more their style, most photographers know that if you want to find great scenery and maybe even some wildlife you’ll need to put some effort in.
Effort generally means hiking…and in the rainforest hiking generally means getting hot, muddy, wet, and uncomfortable… so before we even consider what kind of camera gear you should pack, we’re going to talk just a little about the other essentials like shoes and clothing because if you’re miserable…taking pictures is going to be the last thing on your mind.
Footwear
In the rainforest, you’ll find that mud is a constant friend that you can learn to count on. While sandals might cut it for beach photography, in the jungle you definitely want closed-toe shoes that provide good ankle support. The lighter, the better; trudging uphill while carrying a camera bag — even a light one — is tough work. Since half the plant and animal species on our planet call the rainforests home, the ever-present but often unseen spiders, snakes, ants, and various stinging and poisonous plants add yet another reason why you don’t want your toes sticking out while you’re focused on finding a great spot to take photos. That said, a pair of basic plastic and foam flip-flops is a nice bonus item to have in your bag to slip on after you’re done on the trails and want to give your feet some fresh air.
Clothing
Temperature in the rainforest depends greatly upon altitude. At lower elevations, the heat can be like a sauna, while at higher elevations in the cloud forests, temperatures can actually be quite chilly, especially in the early morning and evening. It’s good to wear a short sleeved shirt as a base layer and a lightweight, waterproof jacket overtop. As for pants and shorts, steer clear of denim — in the rainforest once you get a pair of jeans wet it can take eons for them to dry! As a photographer I like to wear pants or shorts that are lightweight, breathe easily, dry quickly, and have a lot of pockets that I can stick filters, shutter release cables, spare batteries, and maybe even a lens in if I find myself changing frequently between two lenses. While backpacks are great, it’s often not practical to go rummaging through one when it’s raining and the trail is muddy — having what you’re looking for in a pocket can make life easy. Quick drying socks are a must — high socks are much more practical than ankle socks which make it easy for mud to slip into your shoes as you walk.
While a lightweight, waterproof jacket with a hood will help to keep the rain off you, you won’t usually be able to wear it over your backpack, so having a larger rain poncho like this one as well is useful for keeping your camera bag dry while you walk if your bag doesn’t have its own built in rain cover.
Other Essentials
Be sure to bring along the usual hiking essentials of a hat, sunscreen, bug spray, a basic first aid kit, small flashlight, and plenty of water. For me, any trip into a damp environment where rain is a threat is never complete without several plastic bags to supplement my camera rain gear. I’ll usually bring a large garbage bag or two — perfect to use in a pinch as a makeshift rain cover for your bag. Several 1-2 gallon size freezer bags and a variety of sandwich bags come along as well — if needed, they can offer some protection to electronic items like laptops, camera batteries, battery chargers, and even cameras and lenses. While you shouldn’t trust a plastic bag to be completely waterproof, if you’re caught in a rainstorm they can add a bit of peace of mind. For added benefit, a few reusable silica gel desiccant packets can help to remove moisture from the air in the bags.
Camera Gear
As I said at the beginning — less is more when it comes to camera gear. Since many of the world’s rainforests are located in less developed countries where crime can be an issue, the less luggage you’re dragging around with you, the better. While those who travel in a more luxurious fashion than I do may be fine leaving their unused gear in a hotel room, those who find themselves sleeping in hostels and tents will no doubt be as reluctant as I am to leave any camera equipment unattended.
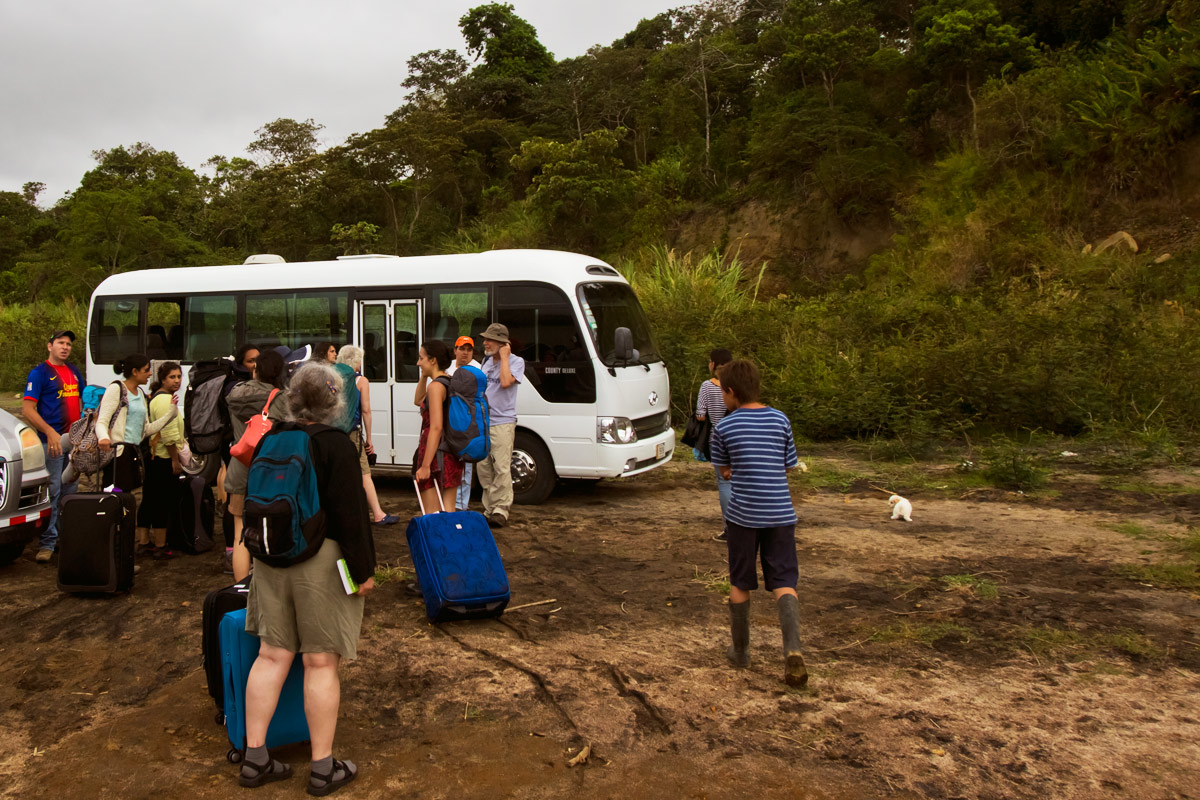 Beyond basic safety concerns, bringing a lot of stuff on your trip is just downright inconvenient. On one leg of my recent trip through Costa Rica, we took a bus ride to reach a boat which ferried us across a lake to meet another small bus. As it was pouring rain, I was able to scramble down the slope of a muddy embankment to the water without too much trouble — I had managed to pack everything for the entire trip including all of my camera equipment, a laptop, and my clothing into a single small backpack. A group of young women on the bus had not packed so frugally, and it was painful to watch as they tried to roll these massive wheeled suitcases 300 feet down the muddy slope. I jogged back to the top to help the one who seemed to be in the most trouble, and even I found it a struggle to carry the massive suitcase down to the boat. Weighing around 50 pounds, I can only imagine what she had felt necessary to bring along on the trip.
While you’re packing for your rainforest adventure, be conscious of how you’ll be traveling and where you’ll be staying. If you are renting a LandRover, bringing along a Pelican 1650 hardcase will be less of a logistics issue than if you’re planning on traveling by public transport.
Camera Bags
When it comes to camera bags, you’ve got plenty of options. Personally, I travel light and stay cheap — if it’s valuable, it stays in my bag and that stays on my back. Bringing a big bag encourages you to bring a lot of stuff, and the more stuff on your back the less you’ll want to walk around.
For photographers like myself who like to travel with a small amount of camera gear, a regular backpack with comfy straps paired with a camera insert bag. If you need to bring a lot of gear, you’ll find that a backpack or slingbag will likely be your most comfortable option. For walking around a city, shoulder bags can be a great choice, but if you’re going to be hiking through the forest you’ll find that a bag that distributes weight more evenly is usually going to be your best bet. If your bag doesn’t include a rain cover, or you’re just using a regular backpack with a camera insert inside, you can buy a rain cover for your bag separately.
Cameras
The question of “Which camera is best for rainforest photography?” is one that you’ll still see being asked on photography forums. The answer is pretty simple — the best camera for just about any type of photography is usually the camera that you already own and are familiar with. If you do have the luxury of buying a new camera, you’ll be presented with a dizzying array of options, some of which we’ll take a look at below. If you’re careful with your camera equipment though, virtually any modern digital camera with manual control settings that can shoot in RAW can take great photos in the rainforest, but some camera bodies are especially well suited for challenging environments.
I often see people on the forums advising new photographers that unless they buy the most expensive high end DSLR camera, they won’t be able to take great photos, especially in a tough environment like the rainforest. Personally, I think this is nonsense and while it’s true that professional camera bodies do have a lot of specialized benefits for those who actually need them, I’ve always found that I’m able to get photos that I want regardless of whether I’m using a professional DSLR or an entry level DSLR. In fact, on my most recent trip to the rainforest I brought along the 18 megapixel Canon T3i, the predecessor to the Canon T4i and T5i — cameras that are typically regarded as entry level DSLRs. While entry level cameras like the Canon T5i, Canon SL1, Sony A65, Nikon D5300, and Nikon D3200 lack the weather sealing of more expensive cameras, if you’re careful and don’t allow your camera to be drenched with rain, even these more affordable camera bodies are pretty tough.
If you want additional protection from the elements, weather sealing is a very nice feature to have on a camera, but it’s important to keep in mind that if your camera is weather sealed, you’ll also need a weather sealed lens to take advantage of this benefit. While some photographers view weather sealing as a license to keep shooting in the pouring rain, I try to keep my cameras as dry as possible whether they’re weather sealed or not. You’ll find plenty of anecdotal evidence online that even weather resistant cameras can and do fail in bad weather. The drier you keep a camera — even a tough one, the happier it will be! While camera advertisements may imply that you can take your weather resistant camera to the ends of the Earth, a quick glance at the official specifications will reveal that most camera manufacturers don’t actually intend for their cameras to be used in the rain and extreme humidity, even if they’re considered weather sealed or weather resistant.
For those in the market for a new weather resistant DSLR but lacking a large budget, the 16 megapixel Pentax K50 is an excellent camera to consider, offering very good image quality in a camera body that is built to function in tough conditions. At a higher price point but still quite affordable for many photographers is the 24 megapixel Pentax K3 DSLR. Built like a tank with 92 sealing parts, I think that the K3 is probably the current best value when it comes to a weather sealed DSLR — you can take a look at my in-depth review of this camera here. The Pentax K3’s predecessor — the 16 megapixel Pentax K5 II and Pentax K5 IIs are both weather sealed as well and still make excellent, value-priced cameras for Pentax shooters to consider.
Released in 2009, the weather resistant 18 megapixel Canon 7D is getting a little long in the tooth, but it’s still a great camera for Canon shooters to consider — a used 7D body can be picked up for not too much more than most brand new entry level DSLR bodies. At a higher price point are the full frame Canon 5DIII and Canon 6D cameras, both of which are weather resistant and produce terrific results. At the highest price point, but also offering the most rugged construction and the most weather resistant seals is the full frame Canon 1DX Mark II.
From Nikon, at the more affordable end of the scale is the Nikon D7100 with a weather resistant magnesium alloy body and a 24 megapixel DX sensor. Full frame options with weather resistant magnesium alloy bodies include the 24 megapixel Nikon D610, 36 megapixel Nikon D800, 16 megapixel Nikon Df, and 16 megapixel Nikon D4S — all intended for very different types of photographers.
Lenses
While having a good camera body is always helpful, having a great camera lens is perhaps even more important. The lighting conditions in the rainforest can be very tricky to work with — even in the middle of the day only a small amount of sunlight might be able to filter through the canopy and any low-hanging clouds and mist can make things even darker. Dark conditions require either a high ISO speed, a slow shutter speed, or a wide maximum aperture to obtain a properly exposed image. To learn more about the pros and cons of changing each exposure variable, you’ll find our exposure tutorial helpful.
When packing for a trip into the rainforest, you’ll want to bring your fastest lenses (this means the ones with the widest maximum aperture like f/1.8 or f/2.8). Slower lenses with a maximum aperture of only f/5.6 will be difficult to use, but if you don’t have anything faster you’ll still be able to come home with great photos if you bring along a sturdy tripod and leave the shutter open for longer.
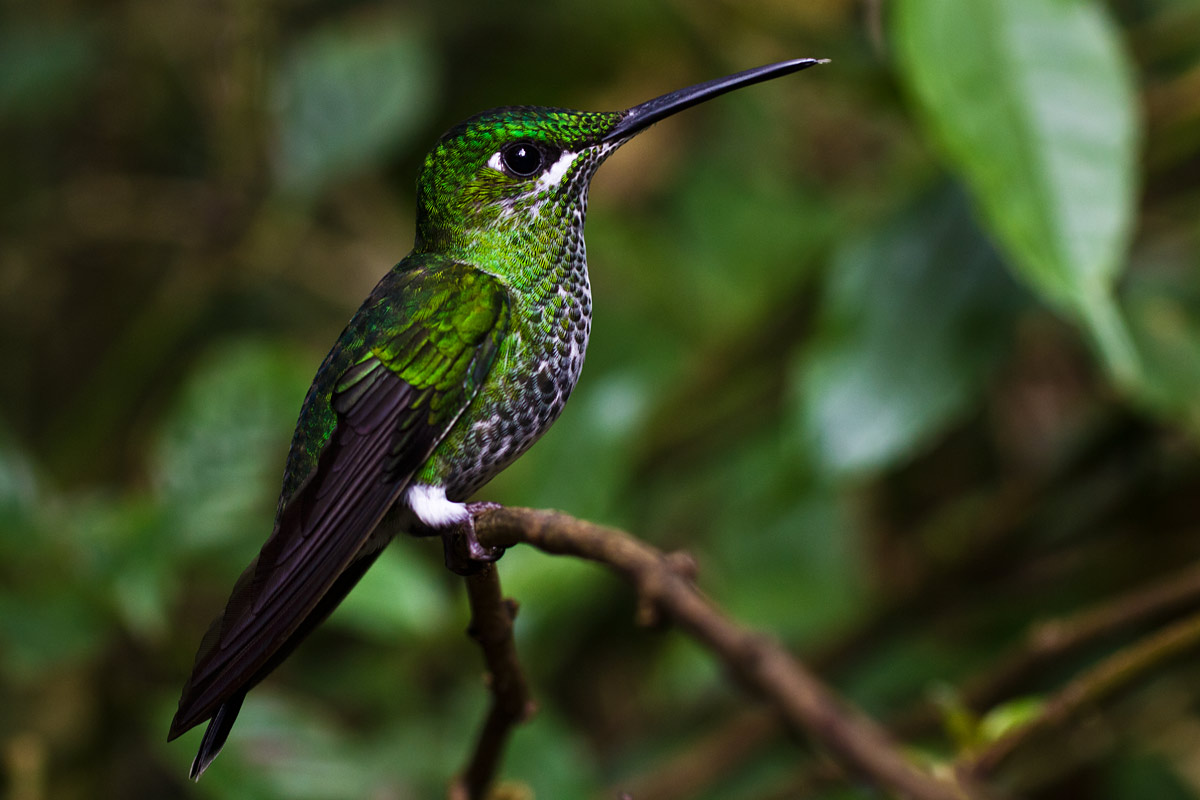
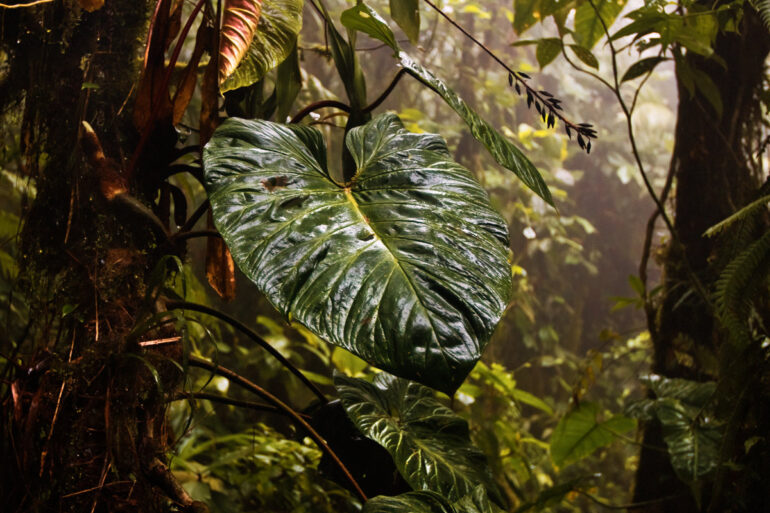
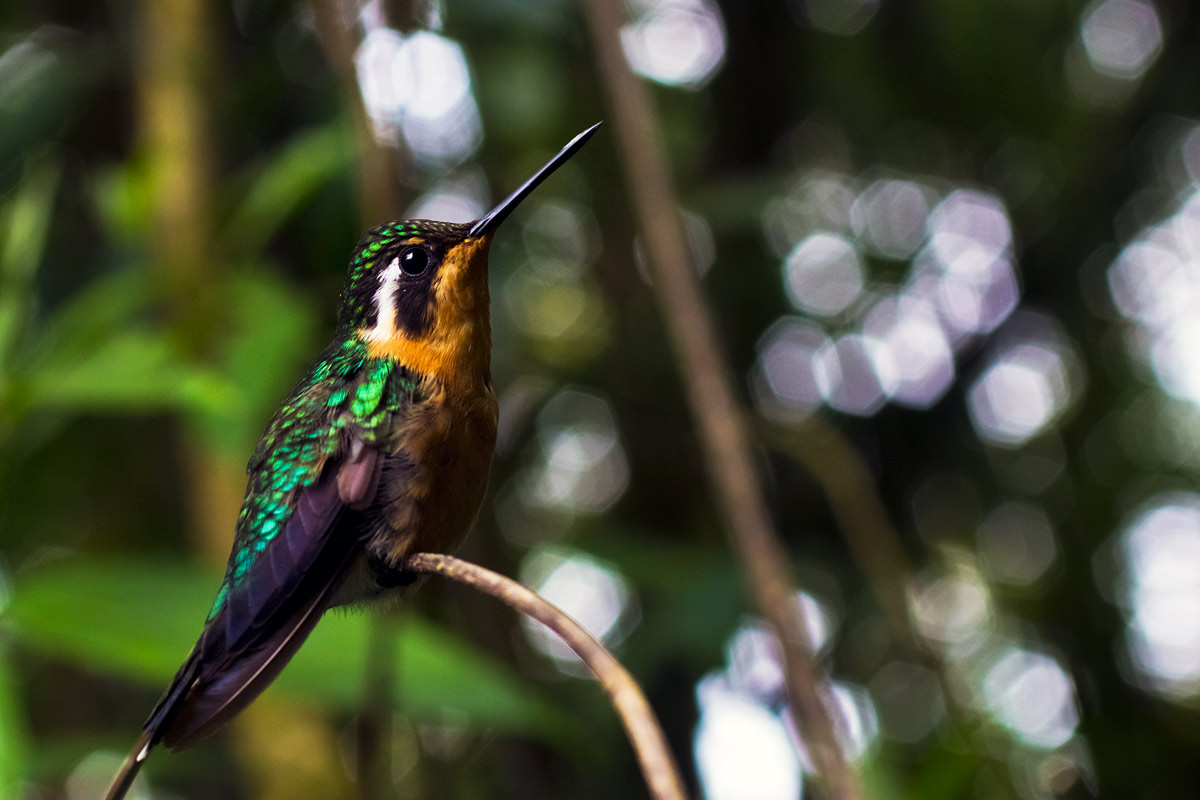
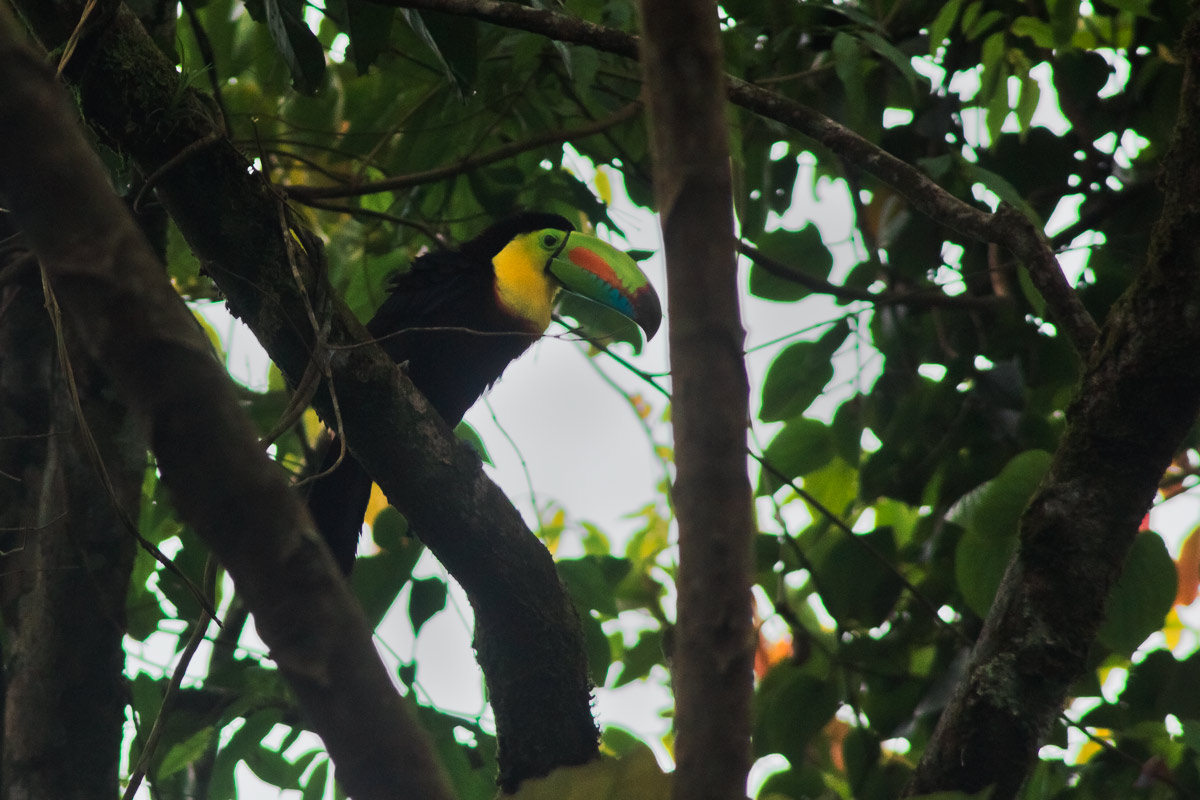
If you’re limited by space and weight, there are three types of lenses that I think are ideal for bringing along on a rainforest trip: a wide angle lens, a macro lens, and a telephoto zoom lens. For most photographers including myself, the wide angle lens will prove to be the most used one. In a closed-in forest environment, a wide angle lens allows photographers to capture a more expansive look at the lush greenery surrounding them. It’s nice to get a good mixture of photos though, and macro photography can provide an amazing look at the tiny details you’ll find everywhere in the rainforest like spiderwebs glistening with dew and delicate, emerald green moss growing on trees. I’m especially fond of the Canon 50mm f/2.5 Compact Macro Lens which is reasonably small and light and functions not only as a very capable macro lens but also as a regular 50mm lens with excellent sharpness. Finally, a fast telephoto zoom lens like the Canon EF 70-200mm f/2.8L USM Telephoto Zoom Lens or the Nikon 80-200mm f/2.8D ED AF Zoom Nikkor Lens is perfect for capturing photos of wildlife and birds like monkeys, toucans, sloths.
An alternative to fast lenses is to use stabilized lenses which correct for the vibrations caused by hand-holding a photo. In order to get a sharp photo in low lighting conditions you might normally need to use a shutter speed of 1/100th or 1/125th — with a stabilized lens like the new Canon EF-S 10-18mm f/4.5-5.6 IS STM, you might be able to obtain similar results using a much slower shutter speed of just 1/15th. While image stabilization is a very helpful feature, it can only correct for the small movements caused by camera shake — any moving elements in the scene itself, like leaves and branches swaying in the breeze or monkeys jumping from tree to tree will still be motion-blurred from using a slower shutter speed.
If you don’t have a fast lens or a stabilized lens and buying one isn’t in the cards, don’t worry — a tripod will allow you to take longer exposures in the dim lighting of the rainforest with ease!
Tripods
Tripods are an essential piece of gear for serious landscape and nature photographers, especially those heading into the rainforest.
While any tripod is better than no tripod, you’ll want to purchase a tripod that is both sturdy and lightweight and preferably compact to make it easy to travel with. Since you’ll be walking in the rainforest, you want to have your camera in your hands, not a bunch of gear like your tripod. Choosing a tripod that’s small and lightweight will allow you to easily attach it to your backpack.
When selecting a tripod, you’ll want something that you can set up and break down quickly — if it’s raining, you don’t want to be messing with a giant, heavy tripod — if it takes you several minutes to get it set up, you’re going to find yourself shooting less than you would if it was less of a hassle. Steer clear of the tourist tripods made mostly of plastic that you can find for sale in drugstores and spend a little bit more money on a tripod that will last for years and minimize vibrations adequately. There are many good tripods that can be found in every price range, and I’ll list some of the highest rated models below:

- Meet Billy 2.0 - the new evolution of Punks tripods brought to you by 3 Legged Thing. This lightweight...
- Extending from 4.6" up to 65.3", Billy 2.0 offers a wide range of working heights, with a removable and...
- Available in blue or black and orange, Billy 2.0 is a compact travel-friendly tripod for everyday use...
- Improving on the original Billy tripod, we’ve given our twist leg locks a face lift with improved grip...

- TRAVEL FRIENDLY: Weighs just under 3 pounds and fits easily into backpacks and carry on luggage.
- CENTER BALL HEAD: Manfrotto 494 center ball head with three independent control knobs.
- QUICK SETUP: Side pull selector for fast setup with both hands.
- VERSATILE: 16" minimum height and 59" maximum height for versatile photography.
- Meet Billy 2.0 - the new evolution of Punks tripods brought to you by 3 Legged Thing. This lightweight...
- Extending from 4.6" up to 65.3", Billy 2.0 offers a wide range of working heights, with a removable and...
- Available in blue or black and orange, Billy 2.0 is a compact travel-friendly tripod for everyday use...
- Improving on the original Billy tripod, we’ve given our twist leg locks a face lift with improved grip...
Techniques
Exposure & Lighting in the Rainforest
The lush green warmth of the rainforest makes for a compelling image — the shadows and mist and natural light filtering through the canopy creates a beautiful natural atmosphere that using artificial light can ruin. With such dense growth though, lighting conditions are often less than optimal. To compensate for this low light without using a flash there are a few options we can use. A digital camera with great high ISO performance like the Nikon D4S, Canon 6D, Sony A7, and many more can allow you to increase the camera’s light sensitivity without a substantial increase in digital noise. Fast lenses are another option — with a large maximum aperture found on lenses like the Canon 16-35mm f/2.8L II, images can be captured in low light without needing to increase the ISO as much. But what if you don’t want to shoot wide open with your lens’s maximum aperture setting and you also don’t want to increase your ISO? Perhaps the best option of all that will allow you to use a smaller aperture (resulting in more of your scene in focus) and a lower ISO (resulting in less noise and clearer images) is to make use of a tripod.
Because setting up and breaking down a large tripod can be a time consuming process, particularly if you’re also hiking, and even more so if it’s raining, you’re best off bringing a small tripod. Besides being quicker to set up, it will be much lighter to carry — when you’re trekking uphill with a backpack of camera gear strapped to your sweating body, even the single pound or two that bringing a smaller tripod can save will make a world of difference. Using a tripod will allow you to use longer shutter speeds, ranging from anything under what you can handhold (about 1/50th for most photographers) to as long as several seconds. Using a remote control or shutter release cable is a good idea when taking tripod mounted shots to minimize vibrations. In lieu of a shutter release cable, you can also get by just fine by using your camera’s self timer. For long exposure photos in the rainforest that are longer than 30 seconds though, you’ll need to use your camera’s Bulb setting, which will require a shutter release cable.
Since you’re likely to use higher ISO settings at least occasionally in the dim light of the rainforest, always remember to return your ISO setting to a lower value once you’re done shooting. It can be pretty easy to forget that you’ve left your camera set to ISO 1600.
Composition
 Unlike a desert where a subject like a solitary cactus might be the obvious focal point for your photos, the rainforest can be overwhelming to photographers.
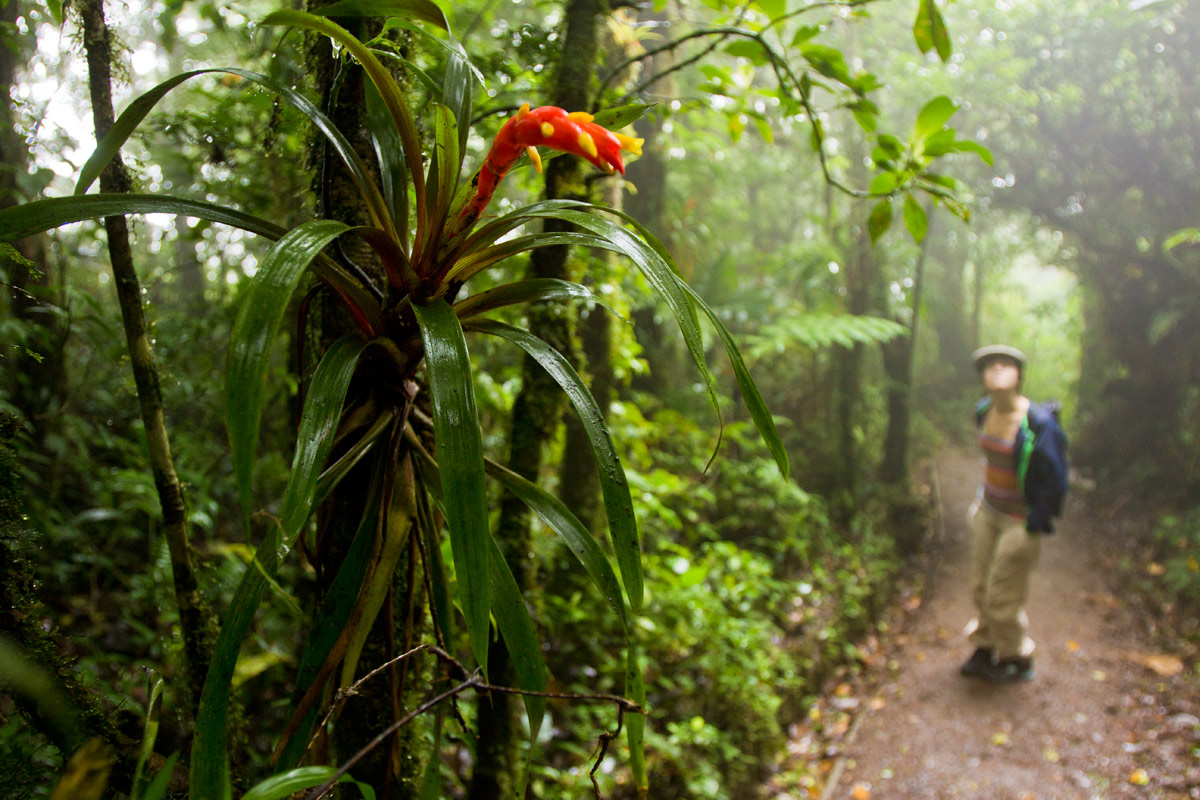
 When you’re photographing a specific element of a scene, like an individual bromeliad or fern, consider how you can isolate your subject from the dense jungle behind it. Changing your shooting position and using a shallower depth of field by selecting a larger aperture setting can help your subject stand out. It’s easy to get excited with so much overwhelming beauty surrounding yourself, but instead of firing off shots like a machine gun in all directions, try to slow down and carefully compose each shot.
When we walk, we tend to look straight ahead and every once in a while we’ll look from side to side; if you want to see anything interesting in the rainforest though, you’re going to need to look up, down, and all around. Fascinating plants and animals are very easy to miss if you’re not looking carefully.
Timing
Photography often requires that we wake up very early, and shooting in the rainforest is no exception. To capture the very popular atmospheric shots of rays of sunlight bursting through the mist, you’ll often need to be in the forest early in the morning when the sun is at a very low angle in the sky. As the heat of the day returns the water vapor from the forest back to the sky, rainstorms often arrive in the afternoon and the rainforest can become quite dark even around 2 or 3PM. On a clear day, to minimize harsh shadows caused by the sun being directly overhead, the early morning and late afternoon tend to be the best times for shooting.
Filters
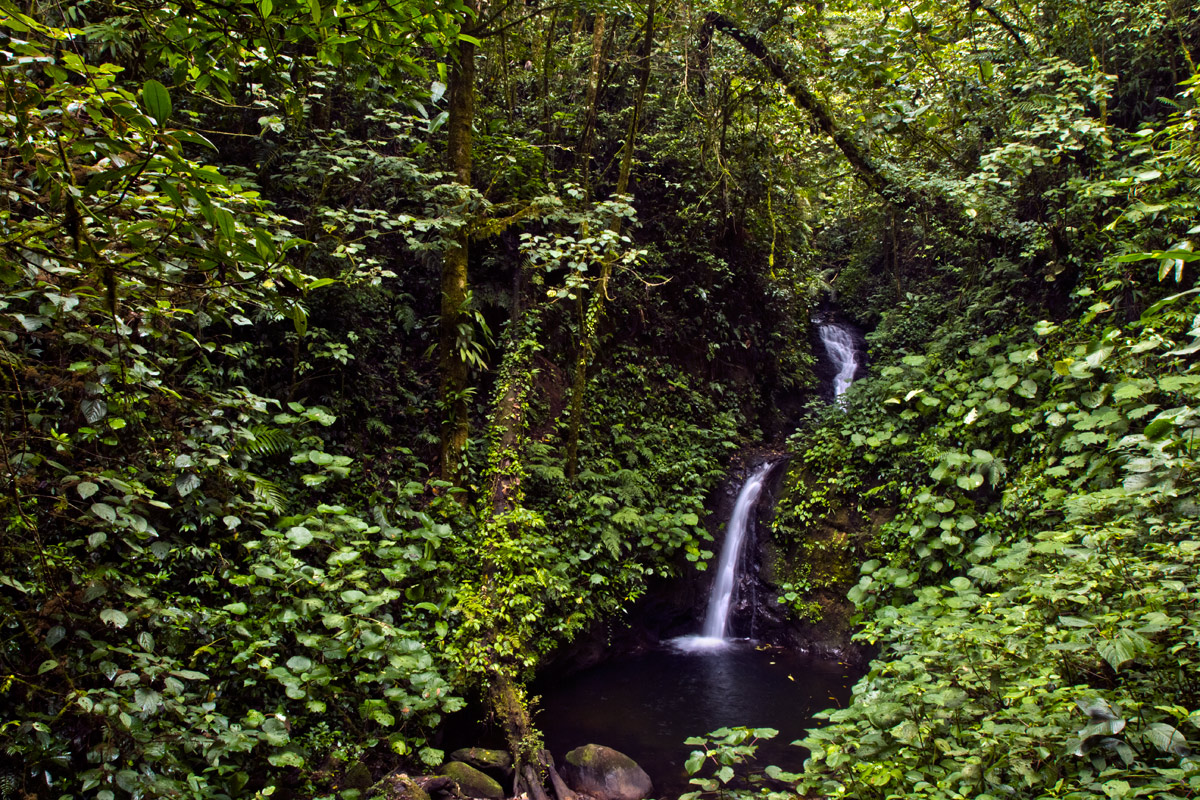
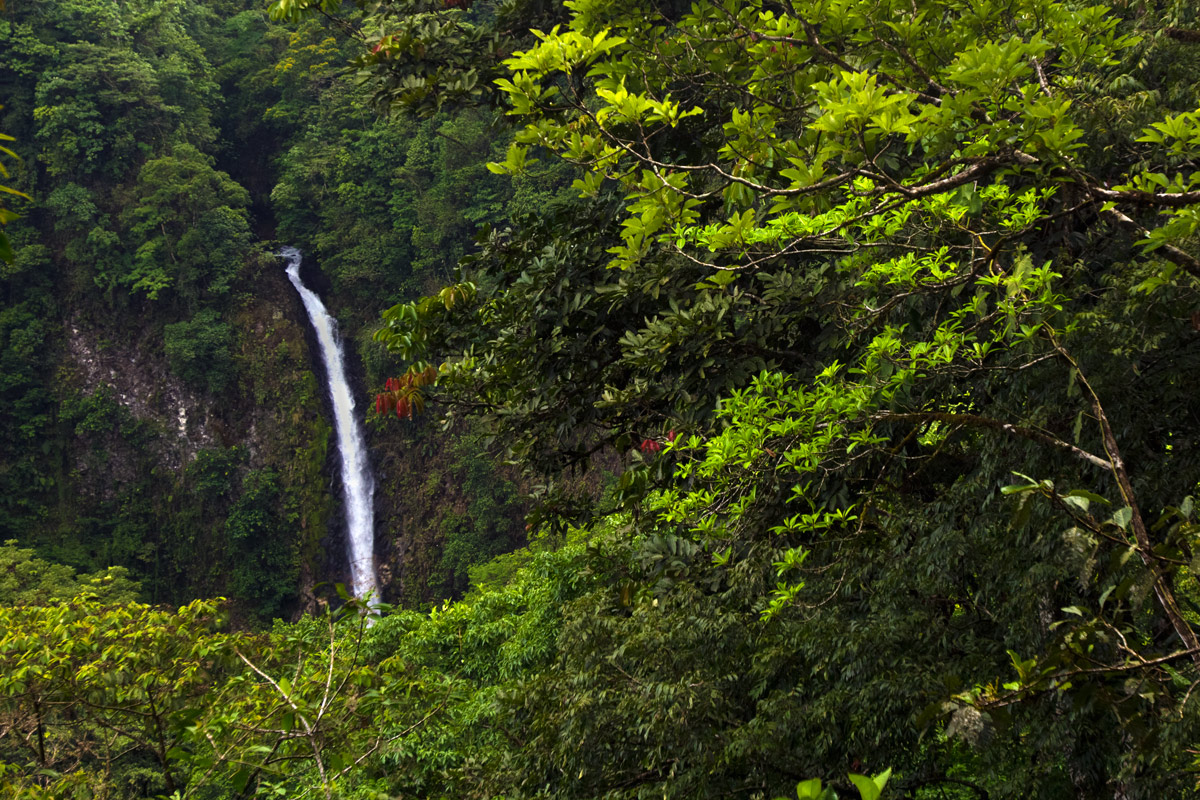
My most used filters in the rainforest are neutral density filters, which you can learn all about in my daytime long exposure photography tutorial and polarizing filters. Neutral density filters reduce the intensity of all of the light, making longer exposures possible — perfect for capturing long exposure photos of rainforest waterfalls and rivers. These ND filters come in a variety of strengths; a variable neutral density filter is a popular option which allows you to rotate the filter to change the amount of light that is blocked.
A polarizing filter blocks polarized light, which reduces the reflections on damp leaves and also enhances the color saturation and contrast — perfect for bringing out the vibrant green tones in the rainforest. Using any filter which reduces the light reaching the sensor means that you’ll need to compensate for this by using a higher ISO, a slower shutter speed, or a tripod.
Dealing with Humidity and Rain
Head over to any photography forum and ask for advice on how to deal with rain and moisture in humid climates like the rainforest and you’re sure to find plenty of people advising you to just buy a weather sealed Canon 1dX Mark II or Nikon D4S. Weather resistant camera bodies are definitely great to have, but they tend to be very expensive and it’s important to keep in mind that weather resistant and weather sealed are not synonymous with waterproof. Even the most weather resistant camera can be killed by water — it’s just a question of how much water.
Whether your camera is weather sealed or not, it’s a good idea to keep it as dry as you can. Camera raincovers like this one by Goja and this one by Vortex are both highly rated and should do a pretty good job of keeping your camera and lens reasonably dry. For added protection if it’s raining, I usually wear my camera on a shoulder strap and keep the camera tucked under my raincoat when it’s not in use. A small umbrella can be used to cover your head and the camera while you’re shooting as well. Regardless of what methods you use to keep your camera dry, when you’re in the rainforest and it’s raining, you’re going to get some moisture on your camera and lens. Keeping a small, dry towel or two handy will help to keep everything as dry as possible.
While rain can be wiped away and blocked with covers, bags, and umbrellas, humidity is one of those ever present threats that is impossible to keep at bay while you’re out shooting in the rainforest. While it can’t be prevented, there are some steps you can take to minimize its effect on your photography equipment.
1. Use desiccant bags like these to reduce the moisture. Placing a few of these silica gel packets in your camera bag won’t help much if you’re frequently opening it, but if you place individual lenses and your camera into sealed plastic bags with as much of the air removed as possible, a few desiccant packets in each bag can help to pull the moisture out of your equipment when its not in use.
 2. Changing lenses is one of the most obvious ways that moisture in the form of humidity can easily enter your camera. The easy but perhaps not the most practical solution, is to minimize your lens changes. Many professional photographers like to carry multiple camera bodies with a different lens on each, both for the security of having a backup camera if one fails and also for the benefit of not having to change lenses which can introduce dust and moisture into the camera body. For some, carrying multiple cameras may be the ultimate solution, but for many photographers it’s simply not an option because of budget issues or just because carrying around twice as much weight is no fun in the hot, sticky rainforest. Whether you bring along one camera or ten cameras, the less you change the lenses the less moisture will find its way into the camera, especially if it’s also raining outside.
3. Fogged lenses are an annoying problem in humid climates like the rainforest. To prevent your lenses, LCD screens, and even your camera body itself from being covered with condensation, try to keep your camera equipment at the same temperature as the outside air. Coming from an air conditioned car or hotel room and stepping into the humid rainforest can mean that your lens will be instantly coated in condensation that makes it virtually impossible to shoot. Once fogged, you’ll need to wait for the temperature of your gear to warm up so that it matches the ambient air temperature. Luckily, this usually doesn’t take too long, but it is pretty obnoxious, especially when you want to start shooting right away. Placing your camera in a plastic bag before heading from an air conditioned area into the humid outdoors can help to minimize the problem of lens fogging by keeping the warmer, moisture laden air from touching the camera until the camera acclimates in temperature.
4. Keep your camera and lenses as free from moisture as possible. A few drops of rain on a camera or lens are unlikely to cause any problems, but if they’re left to sit there for too long those water droplets can begin to seep into unsealed parts of the equipment, where they can cause issues. A dry, absorbent towel or cloth will come in handy while in the rainforest. Your lens is likely to get some water droplets on it to, so having some microfiber cleaning cloths in your camera bag will allow you to clear the front element or attached filter quickly.