We may earn a commission when you purchase through affiliate links. Learn more.
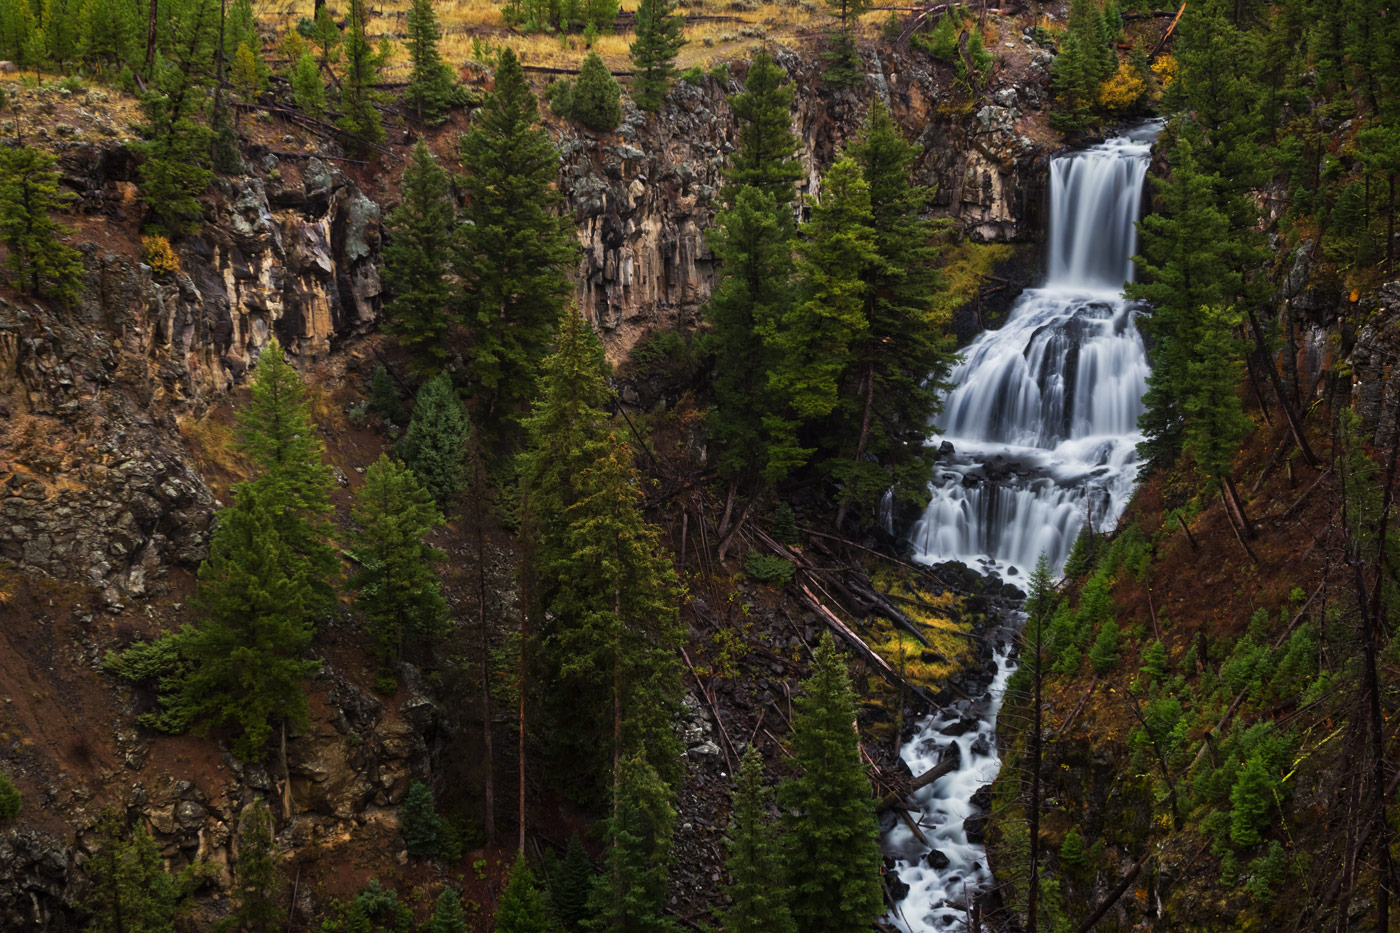
In a natural world filled with incredible wonders, few things are quite as jaw-dropping as a perfect waterfall. From the small waterfalls that form as tiny forest streams flow across rocky slopes to the roaring torrents of whitewater that explode off cliff faces in an awe-inspiring display of raw power, waterfalls are amazing to behold and photograph.
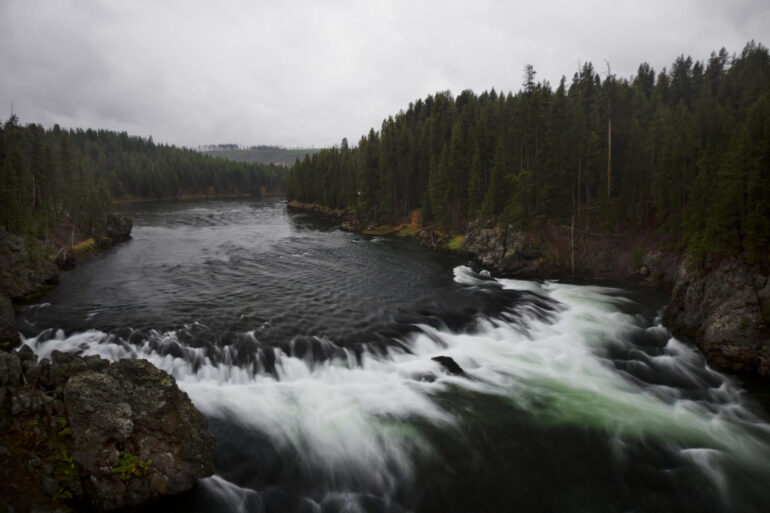
While fast shutter speeds can freeze the motion of a waterfall, long exposures are often the preferred method of many landscape photographers. The magical quality of swirling mist and rushing water cascading over smooth rocks is best captured using long exposure photography which allows the flowing water to blur into a soft, ethereal stream.
In this tutorial we’ll cover some of the techniques of waterfall photography including what kind of equipment you’ll need, what exposure settings work best, and composition ideas.
The Best Cameras for Waterfall Photography
Even though you’ll usually see professional landscape photographers shooting with pretty expensive equipment, you absolutely don’t need to start out with the priciest gear to take some great waterfall photos. Got an old DSLR or mirrorless camera and even the most basic kit lens? Perfect! These days even most phones will do the trick, and can produce pretty impressive results when it comes to long exposures.
At the most basic, you’ll need a camera (or phone) that will allow you to set the exposure time and modify the other exposure variables like aperture and ISO. For waterfall photography, interchangeable lens cameras like mirrorless and DSLR cameras are the ideal tool, since they make it easy to use some of the common filters used in waterfall photography.
Right now, my go-to camera is my mirrorless Canon R8, which I chose because of its lightweight body and full frame sensor. As a frequent traveler, keeping the weight of my gear down is one of my top priorities, but I still wanted a full-frame body and the ability to capture 4K video for content creation.

- Step up to full-frame with Canon’s lightest full-frame RF Mount mirrorless camera featuring a...
- An affordable and compact camera with built-in 0.39” 2.36 million dots OLED EVF up to 120 fps refresh...
- Dual Pixel CMOS AF II covering up to 100% x 100% area with 1,053 AF zones with automatic subject...
- Uncropped 4K movie at up to 60 fps that is oversampled from 6K, Full HD High-frame rate movie recording...
While this is my perfect setup right now, the best camera is the one you have with you — even if you don’t have a DSLR or mirrorless camera, you can still shoot long exposures of waterfalls. Many advanced compact cameras like the Sony RX100 VII and Fuji X100V not only can shoot in RAW, but also allow you to shoot in fully manual mode as well, controlling the aperture, shutter speed, and ISO — exactly what we want for waterfall photography!
Why a Sturdy Tripod is Essential for Waterfall Photography
A sturdy tripod is essential to help you compose much better waterfall photos. Although I’ve taken my share of long exposure waterfall photos without a tripod — usually the result of not expecting to come across a waterfall while on a hike, a tripod really is one of those indispensable pieces of kit. In lieu of a tripod, a rock or log can work in a pinch, but be careful — you don’t want your camera falling off a slippery surface or shifting halfway through a long exposure. For the serious photographer who spends a lot of time shooting long exposures, a tripod is a worthwhile investment that doesn’t need to cost a ton.
Since you’ll be leaving the shutter open for longer to blur the motion of the water, any movement of the camera from even the slightest gust of wind or vibration on the ground will result in photos that aren’t sharp. Any tripod is usually better than no tripod, but you should avoid the ultra-cheap plastic tripods that you can buy at drug stores on vacation — they might be fine for taking a family portrait, but won’t yield good results for long exposures, when even a small vibration can ruin the perfect shot.
Just like digital cameras, tripods range pretty wildly in price, from about $50 to well over $1000. While the high-end tripods usually offer the ultimate in build quality, high-end materials, and vibration reduction, if you want to try your hand at waterfall photography, you don’t need to break the bank.
Tripods like the Manfrotto 055 shown below, or the Slik Sprint Pro II Tripod, Induro AKB1, and the Oben AT-3400 are all highly rated tripods that will work well.

- Versatile and Easy-To-Use Ball Head
- Manfrotto's Q90 Center Column Boasts Quick One Finger Operation
- Easy Link Connection for Adding Accessories
- Upper Disk with Rotating Bubble Level to Level on All Planes
Must-Have Accessories for Perfect Waterfall Shots: How ND and Polarizing Filters Enhance Your Photos
A polarizing filter can help increase the color saturation and contrast in your photo as well as reducing reflections on glass and water, exactly what we want for photographing waterfalls. A circular polarizer also helps to block 1 to 2 stops of light which lets you use a slightly longer exposure time. If you’re photographing a waterfall in the early morning or late afternoon, or if the waterfall is located in a shady area like a canyon or forest, a polarizing filter might be all you need to use longer exposure times.
Circular polarizers screw onto the end of your lenses, so you’ll need to purchase a filter with the right thread size to make sure it will fit your lens — if you use several lenses, but don’t want to purchase multiple polarizing filters, you can purchase one polarizing filter that will fit the thread size of your largest lens and then use step up rings like this one by Fotodiox, which comes with 7 adapter rings, so that you can use one filter on all of your lenses. Step up rings are a convenient solution to using one filter with several lenses of varying size, but there are drawbacks — generally, you want your filters to be as close to your lens as possible. If your lenses vary widely in filter thread size, you can purchase a single step up filter like this 55-77mm Step-Up Adapter Ring by Goja, which will allow you to attach a 77mm filter to a lens with a 55mm filter thread, without needing to create a skyscraper of filters in between these sizes.
Neutral Density Filter
 Neutral Density (ND for short) filters are made of dark glass or plastic (often referred to as resin by the manufacturers) which reduce the amount of light that passes through the lens and reaches the camera’s sensor.
If you’re trying to photograph long exposures of a waterfall in bright sunlight, an ND filter is a necessity.These filters can be stacked with polarizing filters, to get the benefits of both. Without an ND filter on a sunny day, even with your camera’s sensor sensitivity set to ISO 50 or 100 there’s no way to reduce the incoming light enough to use an exposure time of more than a fraction of a second.
ND filters come in a variety of strengths, sizes, and even formats. Low strength ND filters can be used to block just a stop or two of light, perfect for those times when you just need to reduce the light’s intensity by a little bit. If you want to use a 30 second long exposure to capture the silky look of a cascading waterfall, you’ll need a much stronger Neutral Density filter though; perhaps a 9 or 10 stop filter, respectively known as an ND400 and ND1000 filter.
An ND400 filter like this one from Hoya reduces the incoming light by 8 2/3 stops (the manufacturers round to 9 and call it a 9 stop ND filter) — this filter reduces the intensity of the light to just 1/400th of its original strength. An ND 1000 filter or 10 stop ND filter like this one from B+W reduces the light even more to just 1/1000th of its original strength, blocking out 99.9% of the light. A “stop” reduces the light by half, so a 3 stop ND filter allows in just 1/2 the light that a 2 stop ND filter does. A 4 stop ND filter allows in only half the light that a 3 stop ND would allow, and so on.
Neutral Density filters come in a few configuration options — circular, screw on filters like you’re probably most familiar with, and square/rectangular slide-in filters that require a special filter holder. Both have their pros and cons, and both can be used to take amazing waterfall photos. Filter brands like Lee, B+W, and Hoya enjoy a large share of the market thanks to their excellent & consistent quality
Shutter Release Options:
Most cameras don’t have a preset option for shutter exposure lengths of more than 30 seconds, so you’ll need to switch to the “Bulb” setting to control the exposure time manually.
There are a few options to trigger your shutter remotely:
- Shutter Release Cable – A wired remote allows you to trigger the shutter without touching the camera itself. Look for one with a locking mechanism to hold the shutter open without needing to hold the button down manually.
- Wireless or Bluetooth Remotes – Many cameras support wireless remote controls, offering the same hands-free benefits as a cable release.
- Smartphone Apps – Many modern cameras now feature Wi-Fi or Bluetooth connectivity, allowing you to control the shutter via a manufacturer’s app. This is an easy and convenient way to set exposure length without needing to carry extra gear with you.
- Intervalometers – For even more advanced control, an intervalometer allows you to set precise exposure times, the number of exposures, and time intervals between shots—ideal for long exposures and time-lapse photography.
How to Pick the Perfect Time and Weather for Waterfall Photography
Overcast days may not make for very photogenic skies, but they are usually great for waterfall photography. Bright sunlight on a clear day can cause blown highlights and dark shadows on the surface of the water, but the softer diffused light of an overcast day gives a scene more even lighting.
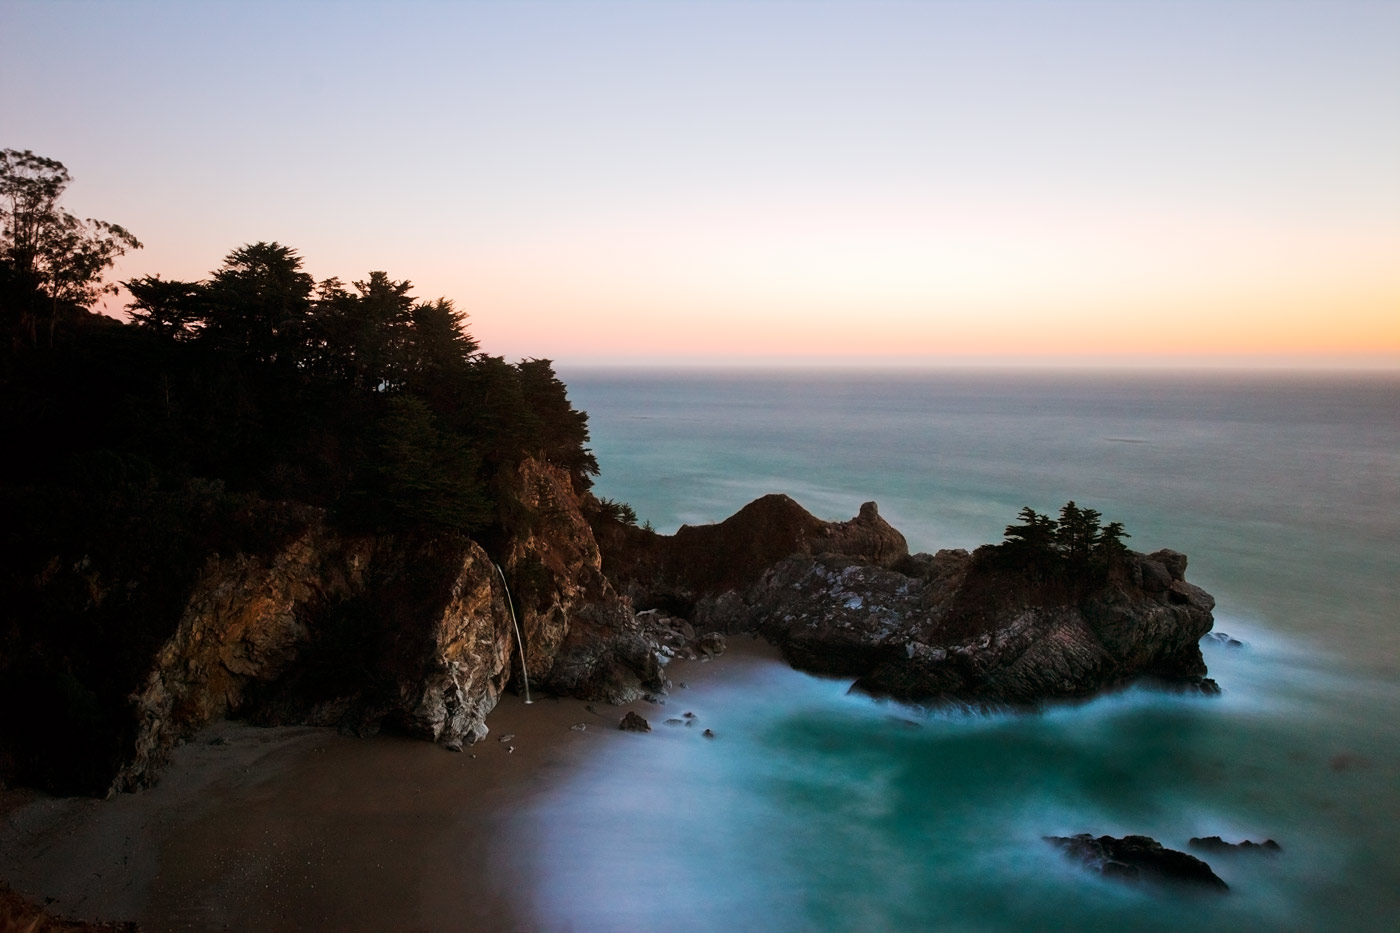
Just before sunset and just after sunrise, during the golden hour, can be another great time for waterfall photography. A favorite time to shoot for many landscape photographers including myself, the light during the golden hour is softer and warmer in tones than in the middle of the day.
While softer light is optimal, that doesn’t mean that the middle of the day is off limits. With a polarizing filter, you may be able to reduce a lot of the harsh glare and reflections on the water. For times when the sky is much brighter than the rest of your scene, a graduated neutral density filter is a great way to reduce the brightness of just part of the frame.
RAW vs JPEG: RAW Wins for the Best Waterfall Images
There’s really nothing to debate when it comes to choosing RAW or JPEG to shoot waterfall images: RAW is the clear winner. Water is an especially difficult subject to expose properly in general, and during a long exposure, all it takes to turn a properly exposed photo into a slightly over or underexposed photo is a passing cloud. When you shoot in Jpeg, the camera throws out a lot of the image data and applies its own presets to the image.
RAW, on the other hand, allows you to recover details in the highlights and shadows of the image that would otherwise be lost. When shooting long exposure photos of any kind, RAW is always the best format to choose and offers the most latitude for editing your images.
Optimal Camera Settings for Stunning Waterfall Photos
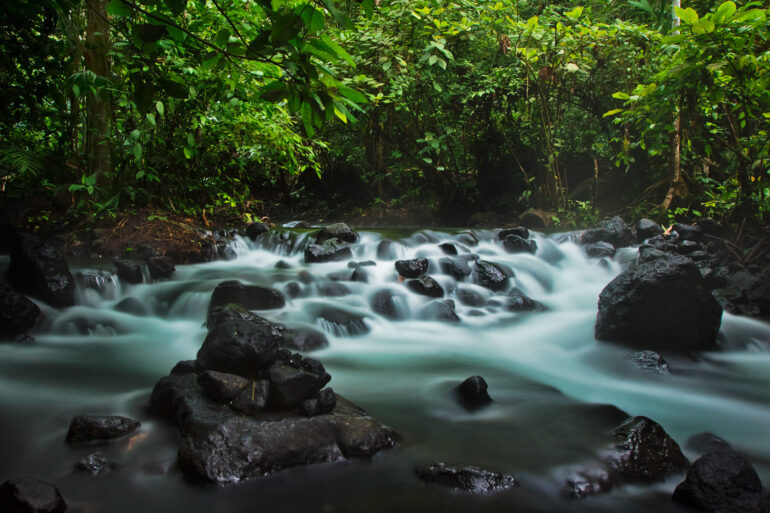
There is no perfect formula when it comes to waterfall photography. The exposure settings you use will depend entirely upon the lighting conditions and how you want the flowing water to look. Shorter exposure times of 1/4 second to a few seconds long will result in shots where the flowing water begins to look silky, but still has some detail. How smooth the water looks depends not only on your exposure time, but also on how quickly the water is flowing — the bubbles and churning water of a raging waterfall will blur together more quickly than the slowly cascading flow of a small waterfall.
No matter how long you want your exposure to be, you should always use the lowest ISO speed that you can to maximize quality and reduce noise — ISO 100 and 200 will usually give the best results, but most modern cameras deliver surprisingly clean results at much higher ISO speeds. Learn all about how ISO works here.
When shooting waterfalls, a lot of photographers think of aperture only in terms of controlling how much light reaches the sensor. This is obviously part of what aperture controls, but keep in mind that your aperture setting also helps to determine the depth of field in your image. You might be able to use a longer exposure by setting the aperture to f/22 to restrict the light, but remember that this means you’ll also have a deep depth of field which you may or may not want.
Personally, I prefer to choose both the exposure time I want to blur the water and the aperture I want for my chosen depth of field, and if that aperture allows too much light in I will use a stronger ND filter to reduce the light’s intensity. For example, if I only want the foreground of my photo with a small forest waterfall to be in focus, I’m better off using a lower f-stop like f/4 instead of f/22. If the scene is too bright using f/4, I’ll use a darker ND filter to compensate, so that I can keep my desired aperture setting the way it is.
Composition Tips for Capturing Breathtaking Waterfalls
If you’re photographing a waterfall using a really dark ND filter, composing your photo using the viewfinder is going to be pretty tricky since you’ll barely be able to see anything through the dark glass. If you plan to keep your camera in place for several shots without recomposing the scene, one option is to set the focus before you attach your ND filter.
This is time consuming though, so if your camera has live view, you may be able to use exposure simulation preview, which will let you digitally zoom in on your scene to set the focus. However you compose your shots, make sure you set the focus for your lens to manual — nothing is more bothersome than going through the trouble of carefully focusing your shot, only to press the shutter and realize it’s still set to autofocus, forcing you to re-focus your shot.