
We may earn a commission when you purchase through affiliate links. Learn more.
If you’re shooting on wet or loose ground like mud or sand, you should push the feet of your tripod into the ground to help stabilize the tripod. Loose ground can easily shift under the weight of your tripod and camera, so anchoring each leg of the tripod works a lot like the foundation of a building. You don’t need to hammer your tripod deep into the earth though — just a firm push on each tripod leg should do the trick. Keep in mind that if you’re shooting on the beach and the water reaches your tripod, that can be enough to shift the tripod’s position, even if the legs are anchored in the sand. To prevent this, especially while shooting long exposure photography, position your tripod above the waterline enough to account for a rising tide that may come higher up the beach during your shot.
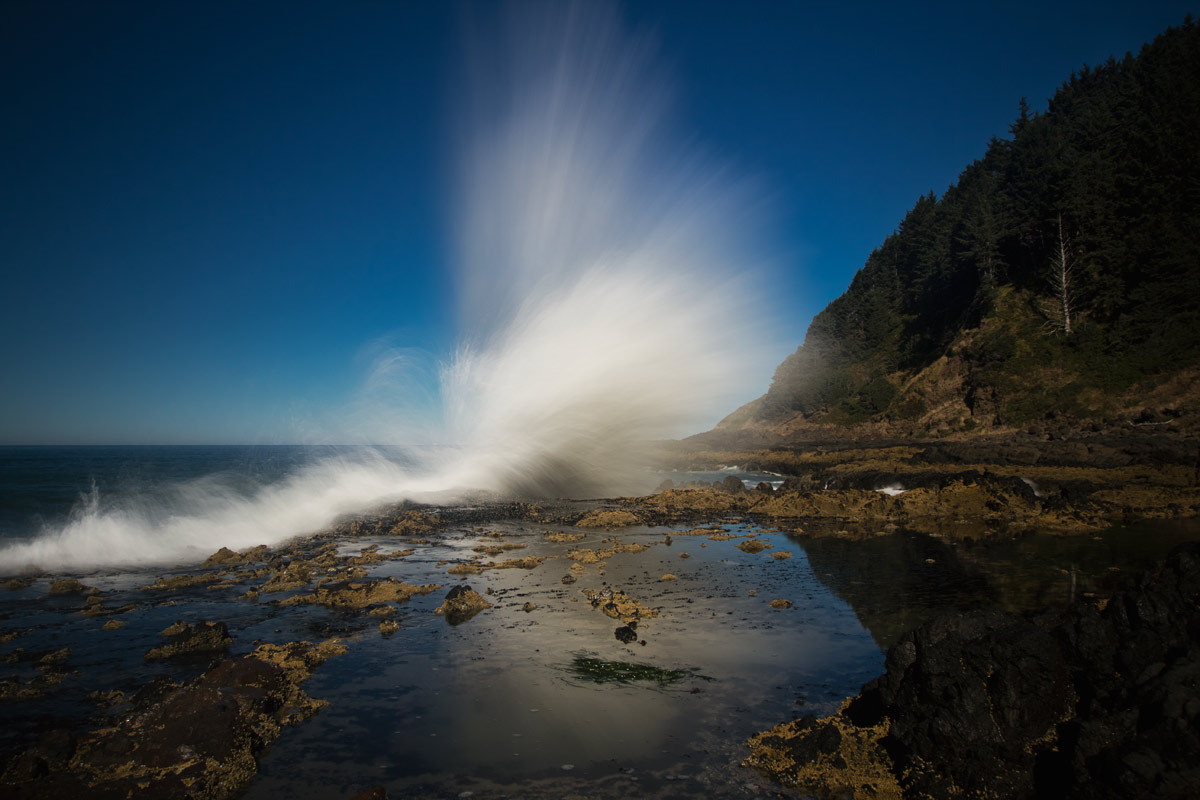
Pushing the tripod legs into the sand to prevent shifting helped to keep this 1 second long exposure taken with a Canon 7D Mark II and Canon EF-S 10-18mm f/4.5-5.6 IS STM lens as sharp as possible.
Keep in mind that if the water reaches the legs of the tripod the sand can shift causing the entire shot to be blurry as the tripod sinks.

Using the right feet on your tripod can help improve stability a good deal. Many tripods feature a removable rubber foot that pops off to uncover a sharp spiked foot, while others require that you screw on and off different feet. The standard rubber foot is good for providing some grip and stability on slick surfaces like concrete and rock, while the spiked foot is designed to dig into grass, dirt, and sand for improved stability and grip. Specialized tripod feet can also be purchased for other surfaces like snow or mud, where a wide circular foot at the base of each leg helps to distribute weight evenly like a snowshoe to prevent the tripod from slowly sinking during a shot.
If you’re shooting on a windy day or night, weight your tripod to keep it steady and to keep the center of gravity low and near the middle of the tripod. Many tripods feature a small hook at the base of the center column for easily attaching a weight. This weight might be a specially designed tripod weight or maybe just a bag filled with some rocks. To prevent the weight from swinging around in the breeze as it dangles from your center column, try to have part of the weight touching the ground.
Have you ever noticed how the thinner top branches of a tree sway in the wind more than the thick trunk at the base of the tree? The sturdy legs of a tripod work in a similar fashion to the roots of a tree, adding stability to the tripod to minimize vibrations. Like the thinner branches of a tree which extend outward from the more stable trunk, the center column of a tripod is more prone to vibrations the higher it’s extended above the sturdier legs. For the most stability, leave the center column completely unextended.
Similar to the previous tip, the fewer of the tripods leg extensions that you extend fully, the more stable your tripod will be. The thicker top sections of the tripod naturally offer the most stability, so unless you really need to extend your tripod to its full height to improve your composition, you’ll get a steadier platform and sharper photos the closer your tripod is to the ground, especially if its windy or if you’re using the tripod on a surface that isn’t completely solid. You can visualize the reason for this by picturing a ladder — the higher you climb, the less stable it is and the more it shakes.
While you can squeeze a few extra inches in height out of a tripod by keeping the feet of the tripod close together, the wider you space the legs, the more stable the tripod will be. Not only does setting the tripod up with the legs close together make it inherently unstable and raise the center of gravity, it can also help the tripod to topple over if a gust of wind comes along, bringing your tripod and camera crashing to the ground in an expensive disaster. Just like a ladder, a wide tripod base = a sturdy support structure.
Using a shutter release cable, the timer on your camera, or an intervalometer can help to further reduce vibrations. It might not seem like simply pressing the shutter button to take a picture will shake the camera much, but the longer your exposure time, the more obvious the blur caused by this action will be. Triggering the shutter using a cable remote or timer eliminates the need for you to actually touch the camera to take a photo.
The self timer function on your camera is all you need to reduce vibrations for exposures of up to the 30 second pre-set limit on most DSLR, mirrorless, and advanced compact cameras, but to use the Bulb mode which allows you to extend the exposure time indefinitely, you’ll need to make use of a shutter release cable or intervalometer to avoid having to hold the shutter button down for the entire shot.
If you’re shooting with a tripod mounted DSLR, you can reduce vibrations further still by enabling mirror lock-up or using live view, which accomplishes essentially the same thing. With an SLR camera, the mirror reflects the view through your lens up to your viewfinder so that you can compose your shot. When you press the shutter button to take a photo, the mirror flips up in an incredibly fast action so that it no longer obstructs the path of light to the sensor — during the exposure the viewfinder is dark since the light is no longer reflected to it. The action of the mirror moving out of the way is fairly violent on a small scale and causes quite a bit of small vibrations that can take several milliseconds to subside — trivial for quick exposures of fast action, but enough to cause photos that aren’t optimally sharp when viewed at full resolution.
Mirror lock-up flips the camera’s mirror up before the shot is taken, which lets the vibrations from this action subside so they don’t affect the photo.