We may earn a commission when you purchase through affiliate links. Learn more.
Every new amateur photographer makes mistakes — even the long-time photography pros make mistakes and technical errors, but luckily making mistakes is a good way to increase your photography knowledge. Even though learning from your mistakes can be helpful, it’s also a great idea to familiarize yourself with some of the most common beginner mistakes, to help avoid making them in your own photography work. Most of these mistakes are easy to correct and fix, but some can be pretty tricky to fight…especially the first one on the list below!
1. Thinking that more expensive photography gear will make you a better photographer
This is a beginner mistake that not only doesn’t help your photography skills develop, it also hurts your wallet! It’s pretty natural for new photographers to want the fanciest cameras money can buy, but if you’re searching for a new camera…do your best to exercise restraint.
Do more expensive cameras with more robust features have tangible benefits? Absolutely, and this is why many professionals use cameras like the Canon 1DX Mark II, Sony a7R III, Nikon D850, etc. But, these benefits require advanced knowledge and skill to fully utilize, making less advanced and more affordable cameras a better fit for new photographers to learn the ropes on. Just like airline pilots don’t start out in the cockpit of a giant 747, it doesn’t make sense for beginning photographers to start out with the most complex cameras, even if they’re within your budget.
Entry level DSLR cameras and mirrorless cameras like the Nikon D3500, Canon T7i, Canon EOS M100, Sony a6000, and many others are priced to be more affordable options, while still offering large sensors and great image quality.
Most entry level DSLR and mirrorless cameras come optionally bundled with a “kit lens” – a general purpose zoom lens like the Canon EF-S 18-55mm f/3.5-5.6 IS STM Lens that is great for learning with. Although most new photographers typically decide to invest in additional lenses at some point, it’s a good idea to learn the basics with the more affordable kit lens while you figure out what you really enjoy photographing. Some beginner photographers spend big money buying specialized lenses right away, only to find out that they prefer a genre of photography that doesn’t really call for those type of lenses at all.
Learning to explore the limitations of your current gear is one of the best ways to increase your photography skill. If you’re find that your photos are blurry, dark, or overexposed, you don’t typically need a new camera to solve these issues — you just need to learn more about exposure. A good rule of thumb for beginners to stick with to avoid accumulating photography accessories that seem like a good idea on paper but might never actually get used, is to only buy things when you actually need them. 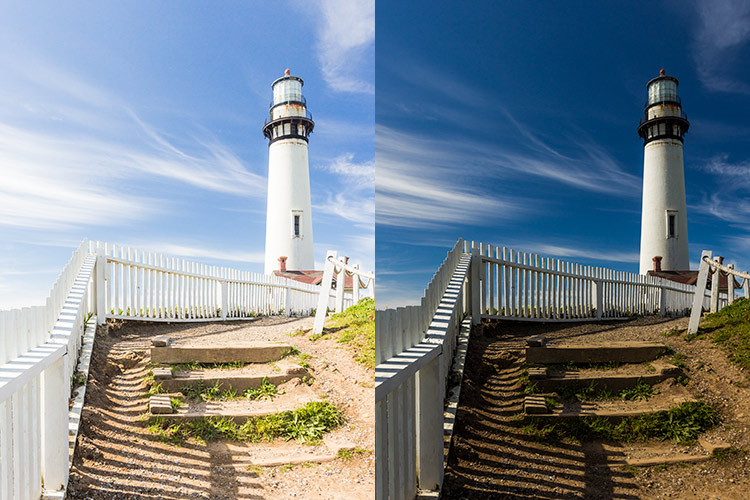
2. Not learning the basics of photography
This one is a beginner mistake that unfortunately affects many photographers who have been shooting for a while too. Much of what makes a great photo is that magical stuff called creativity, but there are some basic principles of photography that everyone should take the time to learn first.
Take some time to learn about ISO, shutter speed, and aperture — these form the foundation of photographic exposure. Luckily, there’s plenty of information on the basics of photography online, including here on ItsJustLight, where we have several beginner lessons devoted just to explaining the essentials.
Equally important is learning the capabilities of your camera. Everyone can find the on/off switch and the shutter button, but if you don’t take some time to familiarize yourself with the myriad of features that your camera offers, you’ll be missing out! You don’t have to necessarily read the user manual from front to back, but do your best to learn what all the buttons and menu options actually do and how they can help you take better photos.
3. Thinking you can fix your mistakes later when editing a photo
Something you hear beginners (and even pros) say pretty frequently goes along the lines of, “Oops…there are some hairs across their face in this shot….but I’ll remove them later,” or, “The sky is too bright, but I’ll darken it later.”
It’s true that there’s an awful lot you can do when post-processing a photo using software like Adobe Photoshop CC, but waiting to correct mistakes is time consuming and often results in photos that aren’t as good as they could have been. Do your best to get your photos right in camera — exposure mistakes can be especially difficult to correct, and in many cases if you’ve got totally blown highlights, there’s nothing you can do to restore the lost detail.
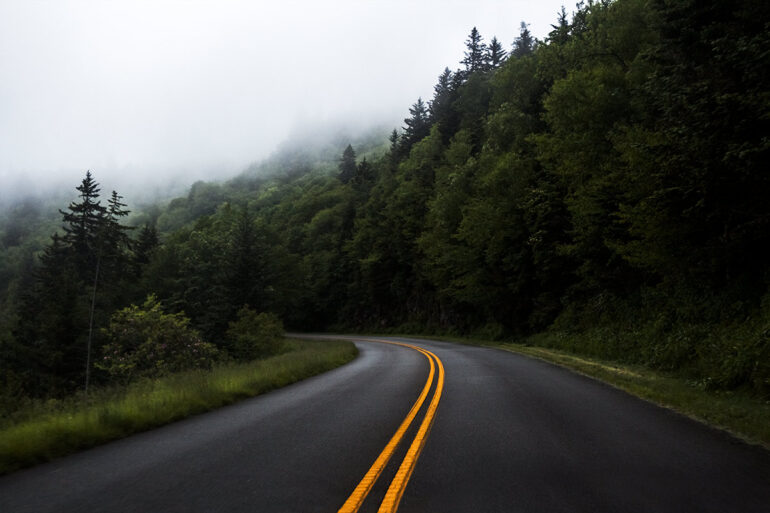
 4. Leaving horizons crooked
Few mistakes are as common, yet so easily prevented, as crooked horizons. Kind of like forgetting to do up a button on your own shirt, but instantly noticing when someone else has forgotten a button on theirs, crooked horizons can be easy to miss in your own photos, but are often one of the first things other people notice.
The easiest way to prevent crooked horizons is to make sure you carefully compose your photo. Using a tripod makes getting horizons horizontal even easier, and many modern cameras like the Canon 80D, Nikon D7200, and others feature the ability to display an electronic level to verify that horizons are level.
5. Not shooting RAW
There’s no rule that says serious photographers have to shoot RAW, but there is a reason that most of them do. Lots of compact cameras and even smart phones are now providing support for RAW image capture, so it’s no longer a feature you’ll find only on more advanced cameras.
Your camera’s sensor records light data from small pixels — when shooting JPEG images, the camera applies presets to this data, adjusting things like saturation, sharpness, white balance, etc. before compressing it into a smaller file that can be instantly shared online or printed. RAW preserves more image data and allows more detail to be recovered from shadows and highlights, and rather than processing the image in-camera, the photographer must process the image file later using software like Adobe Photoshop CC, Darktable, Affinity Photo, and many others.
6. Spotty photos from sensor dust
Much like horizons that aren’t level, those blurry spots in photos caused by sensor dust are distracting, but often go unnoticed (or at least uncorrected) by the photographers. There are several techniques for removing these dust spots in post-production, but the easiest technique of all is to prevent them from being in your photos to begin with!
Plenty of sensor cleaning tools are on the market, but one of the quickest yet typically still very effective tools for removing sensor dust is the Giottos Rocket Blaster, a handy blower tool that lets you direct a stream of air onto the sensor without needing to touch it.
 7. Oversaturating photos
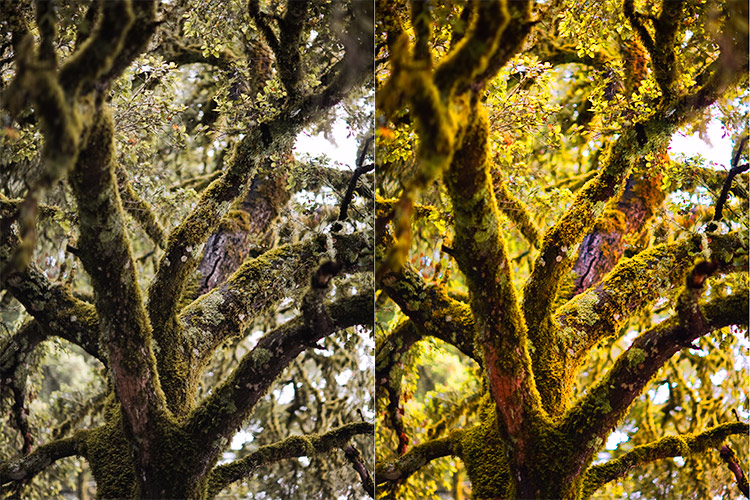
The saturation slider can be a dangerous tool! Over-saturation isn’t something limited to photography beginners, but it’s certainly more common among new photographers in particular. Saturated colors can really make a photo “pop”, but it can be tough to know just how saturated is enough, and if you boost the saturation too high, your photos can easily begin to look more like a psychedelic art project and less like a realistic photo.
In Adobe Photoshop and Adobe Lightroom, both programs bundled in the Adobe Creative Cloud Photography plan, there is often a lot of confusion over how the Saturation and Vibrance sliders differ. Essentially, the saturation slider increases the saturation of all the tones present in the image, whereas the vibrance slider increases the saturation only for tones that aren’t already prevalent and saturated.
8. Losing details in highlights and shadows
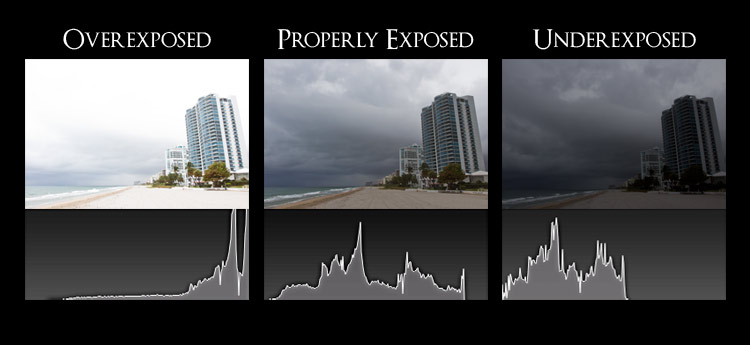
Overexposed and underexposed photos are common beginner photography mistakes, but it’s luckily very easy to prevent over and underexposure using a few handy methods.
One of the best tools for ensuring proper exposure is actually an available feature on most digital cameras, and it’s called a histogram. The histogram graphs a photo’s tonal range from dark black shadows on the left to bright white highlights on the right, with midtones in the center. You can learn all about how to use a histogram here.
If you’re not ready to use manual exposure and want to use one of your camera’s exposure modes, you’ll want to familiarize yourself with how metering modes work. Essentially, your camera needs to take a reading of the light in a scene to calculate the ideal exposure settings. Changing the metering mode allows you to adjust which parts of the scene your camera prioritizes, since certain scenarios like backlighting can be especially problematic. Find out when to use each metering mode in this guide.
9. Blurry photos
Blurry photos can be caused by a few different things, but one thing is for sure — blurry photos are one of the most common beginner photography mistakes!
There are three reasons photos end up blurred:
- You haven’t properly focused on the right spot in your image
- A subject in motion and a shutter speed too slow to freeze the action
- Your own movements that shake the camera or external forces like wind shaking the camera
Because this is such a common issue that a lot of photographers struggle with, we’ve put together an entire tip guide on how to prevent and fix all three causes of blurry photos!
 10. Shooting everything either wide open or with the smallest aperture
Aperture is one of the more confusing topics for those just getting into photography. The aperture not only controls the size of the lens opening through which light passes, but also the depth of field of the resulting image. Depth of field refers to how much of the image is in focus, and a shallow depth of field is a popular look that helps to create separation from the subject and the foreground or background, especially when the out of focus areas are rendered in an aesthetically pleasing way, something that’s known as bokeh.
In fact, the allure of a shallow depth of field and especially bokeh can be so strong that many new photographers will use their lens’s widest aperture all the time. You might hear some photographers refer to this as shooting “wide open” or using a “fast aperture”. In the case of the Canon EF 50mm f/1.8 STM Lens, f/1.8 is the fastest aperture, and this lens renders the out of focus areas beautifully. In many cases, there’s nothing wrong with using a fast aperture and shallow depth of field and it can be beautiful when used for portraits, product photos, etc…, but this kind of look isn’t always ideal.
- 50 millimeter focal length and maximum aperture of f/1.8
- Great for portraits, action, and nighttime photography; Angle of view (horizontal, vertical, diagonal):...
- Minimum focusing distance of 1.15 feet (0.35 meter) and a maximum magnification of 0.21x
- Stepping motor (STM) delivers near silent, continuous move Servo AF for movies and smooth AF for stills
New photographers should evaluate the ideal exposure settings for each shot they take, rather than always sticking to their comfort zone of commonly used settings. Much like how some photographers always make use of a fast aperture, others always stop their lens down as far as it will go, meaning they use the smallest aperture their lens allows – perhaps f/16, f/22, or f/32. Small apertures result in more of the foreground and background in focus, but unless you’re photographing in bright sunlight, they require higher ISO speeds and slower shutter speeds…not always what you want! Choose your aperture specifically with the depth of field in mind.
11. Not turning the flash off when it’s not needed
Head to any fireworks show or nighttime concert and you’ll see camera flashes going off left and right! Unfortunately, there’s no benefit to using a camera flash when you’re trying to photograph something in the distance. Even though a lot of new photographers automatically assume that anything you take pictures of at night requires that the flash fires, your on-camera flash can only effectively illuminate objects a few meters in front of you. Using the flash when trying to photograph more distant subjects at night like fireworks can actually result in lighting up dust particles in the air, reducing the image quality.
 12. Not curating your photography before sharing
Even great photographers take mediocre photos. Part of what makes them great is their ability to weed through the photos which aren’t perfect and select the best images for sharing and displaying. You might take 50 photos of the same thing, and that’s a great way to practice, but when you go to share these photos, you’d want to cull and critique the shots which aren’t great, leaving maybe just a single shot or two that really stands out. This ability to curate your own photography work is something that you’ll get better at over time.
13. Comparing your work to others
One of the toughest beginner mistakes to overcame is the urge to compare your own photography work to others. There’s a lot of value that comes from looking at photography for inspiration, but it can be pretty demoralizing to constantly compare your own skills with that of other photographers.
Wherever you are in your photography journey, there will always be other photographers who are further along on their journey and those who are even farther behind than you. If you’re like most other photographers, there will be times when you find it tricky to be content with where your skills are, but use this as motivation to continue learning and you will see your photography steadily improving — having the ability to critique your own work and see where you can improve is actually a really important part of being a good photographer!


 4. Leaving horizons crooked
 7. Oversaturating photos
 10. Shooting everything either wide open or with the smallest aperture
 12. Not curating your photography before sharing