
We may earn a commission when you purchase through affiliate links. Learn more.
Nothing is better than a day at the beach, and if you’re like most photographers, no day at the beach is complete without your camera in hand! In this guide, we’ll share some handy tips and tricks for great shots as well as some advice for keeping your camera safe in an environment filled with two natural enemies of camera equipment — salt and sand.

1. Keep your Horizons Horizontal!
Nothing can ruin a great photo at the beach like a horizon that isn’t straight. It sounds like common sense, but when you’re having fun it’s easy to forget to carefully compose your photos, leaving the ocean or lake tilting at an impossible angle. Many digital cameras like the Sony A7 II, Pentax K3 II, Canon 7D II, Nikon D7200 and others feature built in electronic horizon levels to help you keep the horizon perfectly straight.
A sloping horizon is something that can be easily fixed in post-processing using virtually any photo editing software like Adobe Photoshop, but it’s much better to get a straight horizon when you actually take the photo — rotating the image and then cropping it later throws away image resolution, and the more crooked your horizon, the more pixels you throw away by rotating and cropping the image.
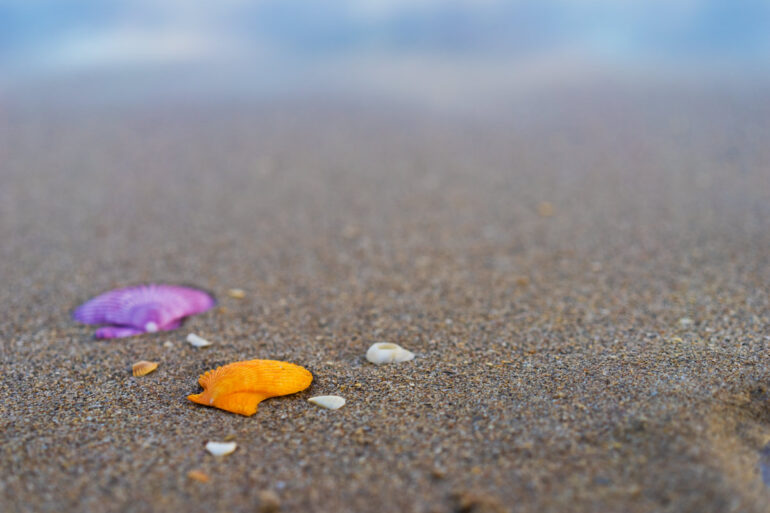
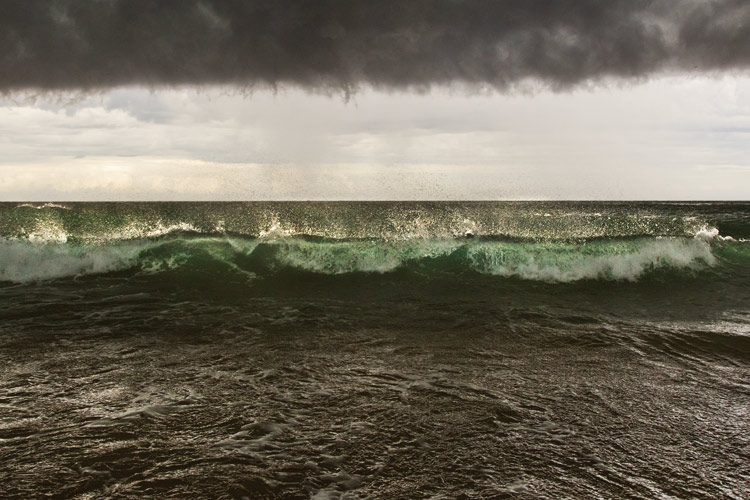
2. Try Shooting from a Variety of Perspectives
Changing your vantage point can completely change the look of your photos — experiment with shooting from a low angle and you might just be surprised by how cool your photos look! Wide seascapes are beautiful, but don’t overlook the details like in the shot above. You’ll find all kinds of opportunities for taking photos at the beach, so make sure you look in all directions and don’t be afraid to look silly while crouching down to get a great shot!
3. Use a Polarizing Filter
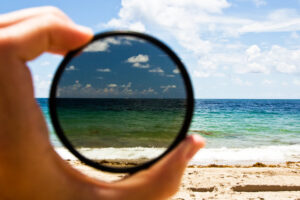 If you’re at the beach, the chances are good that it’s a sunny day. Using a polarizing filter on your lens will help to improve scene contrast, darken the sky, improve the color saturation, and cut the blinding glare of the sun on the water.
Circular polarizing filters come in different filter thread sizes, so be sure to check what size of filter you’ll need. You’ll need to rotate the filter on your lens until you obtain the desired effect.
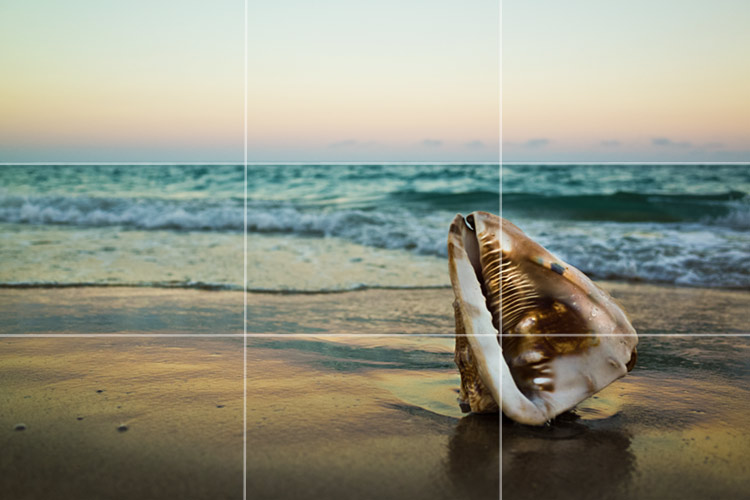
4. Remember the Rule of Thirds
More of a loose guideline than a real rule, the so-called Rule of Thirds divides a photo into nine parts of equal size with two vertical lines and two horizontal lines, like a tic-tac-toe board. Placing your horizon along one of the horizontal lines and your subject near the point where two of the lines intersect often helps to create a photo with the greatest visual impact.
Don’t be afraid to break the rule, but keep it in the back of your mind since it often works very well for beach compositions.
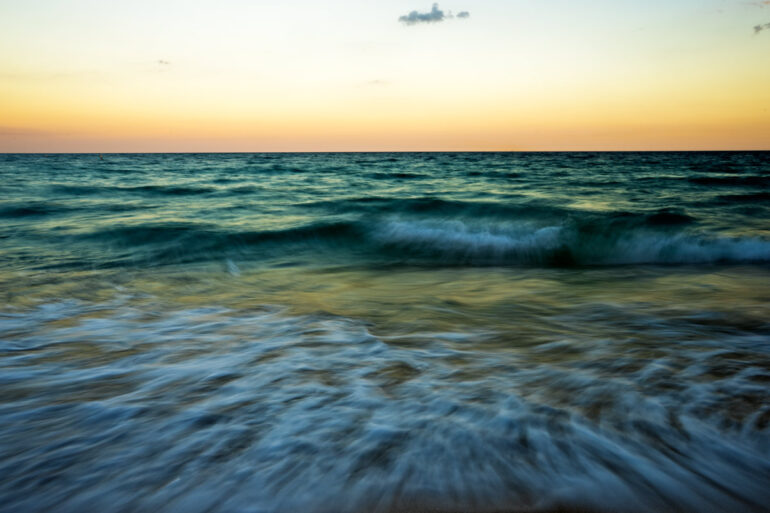
5. Experiment with Long Exposure Photography
When the shutter is kept open for more than a brief instant, waves begin to smooth together and an ordinary beach scene can take on the look of a beautiful painting. If you want to shoot long exposures at the beach during the daytime, you’ll need a strong Neutral Density filter like this 10 stop B+W F-Pro 1 ND 3.0 filter.
When the light intensity is lower in the early morning and evening, it will be easier to shoot long exposures without a neutral density filter. Even an exposure time of only 1/2 a second can completely change how a scene looks! As the light falls, you’ll be able to shoot longer and longer exposures — the longer the shutter stays open for, the more any moving elements like waves and clouds will blur. Remember, if you’re planning on shooting long exposures, you’ll need a tripod to keep your camera steady. A few inexpensive, but well-rated tripods include the Slik Sprint Pro II Tripod, the Dolica TX570DS Ultra Compact Tripod, and the Induro AKB1 Tripod.
Protecting your Camera Gear at the Beach
Try to Avoid Changing Lenses at the Beach
If you’re shooting with an interchangeable lens camera, try to minimize your lens changes at the beach. hanging lenses on the beach allows salt and fine grains of airborne sand to accumulate inside of your camera — not a place you want either of these things!
Use a UV or Clear Filter to Protect your Lens
Even if you don’t have a polarizing filter to attach to your lens, a UV filter or clear filter is something that many photographers ensure every one of their lenses is protected with. These filters are great to use at the beach to protect a lens from blowing sand and salt spray, and since they’re inexpensive, they’re easier to replace if they get scratched than the expensive front element of your lens. It’s usually easier and safer to clean salt spray off a filter than the lens itself, since lens elements often have special coatings that make it difficult to remove water spots.