We may earn a commission when you purchase through affiliate links. Learn more.
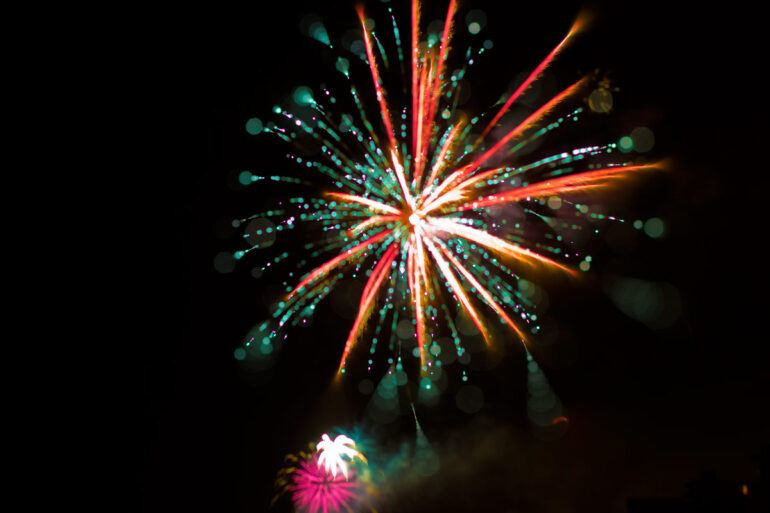
With constantly changing lighting conditions and fast action, a fireworks show requires a bit of know-how in order to come away with great photos. While these tips below should help you get started, every fireworks show will be a bit different and every camera and lens combination will require different exposure settings!

1. Use a Camera that Can Take Fully Manual Shots (And Set it to Manual!)
To take great photos of fireworks, you’ll need a camera that you can set the exposure on manually. You’ve probably seen people trying to take photos of the fireworks with their cell phones and point and shoot cameras, and more than likely you’ve also seen just how blurry and underwhelming the photos usually look. To take fireworks photos that will leave people amazed, you’ll need to be able to adjust all of the exposure variables — ISO, Aperture, and Shutter Speed. Because a fireworks display involves constantly changing burst of light, you’ll want to be as familiar with how exposure works as possible so that you can make the right adjustments easily. If you’re still new to photography, you can learn all about each of the exposure variables in our free photography course.
2. Support your Camera with a Tripod
Good fireworks photography requires taking long exposures, and this makes a tripod a necessity. Even the most steady-handed photographer can’t hold a camera perfectly still for a few seconds — even the slightest movement can cause a blurry photo. A well made tripod, even an inexpensive one like the Slik Sprint Pro II or the MeFoto Road Trip tripod can help reduce camera shake and make it easier for you to focus on taking photos of the fireworks.
Of course, if you don’t have a tripod and absolutely can’t get one either, that doesn’t mean you can’t get creative and come up with your own solution. If you’re stuck without a tripod, an easy DIY solution is to make a bean bag to rest your camera on. It might be a bit primitive, but it definitely works. Fill a sack or sock or a zippable plastic bag (depending on the size of your camera and lens) with dried beans and seal the end — make sure there’s no hole or you’ll be raining legumes on your way to the fireworks show. This system won’t be as shake proof as a real tripod and if you’re using this method, you may want to put your camera on a 2 second self timer or use a shutter release cable or remote so that the movement of you triggering the shutter doesn’t shake the camera.
3. Find a Good Spot to Photograph the Fireworks From
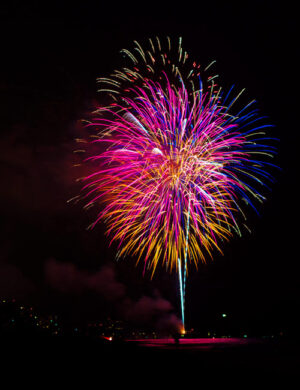
Interesting foreground and background elements can really make a photo something special. While the fireworks are beautiful on their own, I always like to include both the ground and sky to create a more interesting scene with some context. Water is a great element to add to your fireworks photography compositions — you’ll need a wide angle lens like the Sigma 10-20mm f/4-5.6 or Canon 16-35mm f/2.8L to capture both the fireworks explosion and its reflection in the same frame.
4. Turn off Your Flash
At every fireworks show you will always see flashes going off. A lot of people have no idea how to turn it off and others are just under the impression that it’s somehow necessary whenever you’re shooting at night. Using your camera’s flash does nothing to help the scene (and can even decrease the quality of your photo by lighting up dust and smoke particles in the air in front of your camera.)
5. Turn off Auto Focus
Focus your lens before you begin shooting and once you have your focus point set, turn off Auto Focus during the fireworks display. Unless you switch lenses, you shouldn’t need to adjust your focus until you change the angle of your shot.
 6. Shoot Raw
If you’re still shooting in JPEG, there’s no time like the present to make the switch to RAW. While JPEG is fine for some things like a quick snapshot of the family dog getting a bath, it is much less versatile and forgiving than RAW. To get the full scoop on why RAW is the ideal format to shoot in, check out the RAW vs. JPEG tutorial. For fireworks photography, shooting in RAW will allow you a bit of leeway in case your shot isn’t quite right. You’ll be able to recover detail you didn’t know existed and fine tune the image sharpness, noise levels, contrast, vibrance, and numerous other variables. JPEG allows the camera to make all of these decisions (while discarding all of the image information it doesn’t use), and while it usually does an adequate job, adequate isn’t the adjective most photographers strive for. Because photography at night is tricky, especially when the lighting conditions are constantly changing during a fireworks show, it’s not uncommon for photos to be slightly over or underexposed. Shooting RAW ensures that you’ll be able to recover much of the detail in these shots that are slightly off.
RAW files are much larger than JPEG files and will use up more space on your memory card, so make sure you have a large memory card like the Transcend 32GB SD card to prevent running out of space halfway through the fireworks.
7. Don’t Enable Long Exposure Noise Reduction
Long exposure noise reduction is a great feature that can be found on many cameras, including most DSLR cameras like the Canon T6i, Nikon D810, Pentax K3 II, and many others. During a long exposure, the sensor heats up and this causes undesirable noise in your shots. Long Exposure Noise Reduction is a handy feature, which when enabled lets you take one normal long exposure photo, after which the camera takes a second exposure of equal time with the shutter closed. This allows the camera to to plot where the long exposure noise is occurring and using a process known as dark frame subtraction, it removes this noise from the first photo.
Although this can be a great feature to use during many situations, firework shows are generally not the right time to enable Long Exposure Noise Reduction because of the additional time it takes, although some photographers do prefer to keep it enabled in spite of the extra time it takes for every shot.

8. Start with your Camera’s Base ISO
Some cameras can take cleaner long exposure shots at high ISOs than others, but with any camera the lower you keep the ISO the better the image quality will generally be. Start with your camera’s base ISO and increase it only as needed.
9. Start with an F-Stop of f/5.6 to f/16
Your F-Stop controls the aperture of your camera lens, which determines how much light reaches your camera’s digital sensor.
The right aperture to use will also depend on your lens, your location, and how close you are to the fireworks display. Make sure to review your first few photos carefully to see what the exposure is like. If you’re very close to the fireworks and they’re especially bright, you’ll likely need to start with an aperture of f/11 — f/16; if you’re far away from the display, try starting with an aperture of f/5.6 and take a look at your results to see if a smaller or larger aperture would work better.
10. Start with an Exposure Time of a Few Seconds
While it’s tempting to leave the shutter open for as long as possible to photograph the most fireworks bursts, if you use an exposure time that’s too long you’ll begin to see blown highlights and your fireworks will just be overexposed white blobs in the sky. An exposure time of a few seconds is a good starting point that will give you nice trails of light. A longer shutter speed will require a high F-Stop (or lower ISO) to balance your exposure, meaning that you’ll need to make exposure adjustments while you shoot if you change your settings. Smaller fireworks that aren’t as bright, or fireworks that are a long way in the distance might require that you leave the shutter open for longer — maybe as long as 15-20 seconds, while very close, bright displays might require shorter exposure times of just a second or even a fraction of a second. Take a moment to review your images as you shoot them to see if you need to adjust any of your exposure settings.
11. Check your Histogram
Getting properly exposed photos of the fireworks can be tricky, but your camera’s histogram feature can help you with this if you know how to use it! To access your camera’s histogram, you generally need to press the Info button while reviewing a photo.
The histogram displays a digital photo’s tonal range from dark black shadows on the left of the graph to bright white highlights on the right of the graph. When you see a high spike, that indicates that a large portion of your photo has pixels of that tone — the more pixels in your shot that have that tone, the higher the spike will go. With fireworks photography at night, you should expect to see much of the tonal information on the left side of the histogram, but the brighter highlights will spike on the right half of the histogram — what you want to avoid is a sharp spike pressed directly against the right side of the graph which indicates blown highlights with detail that likely can’t be recovered.